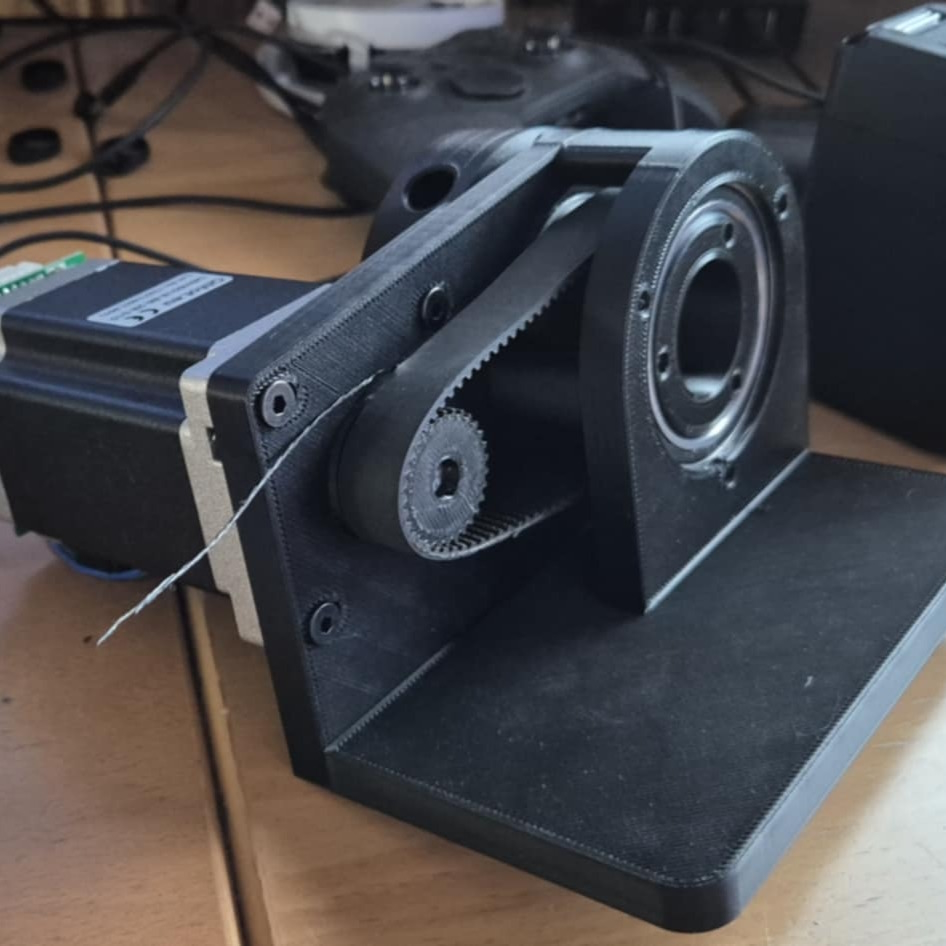
After last weeks trial run the squeeking sound of the bearing kind of hinted at the fact that my normal ball-bearings didn’t like axial forces.. and the propeller is mostly pushing axially into the bearing.. so, time for improvement and redesign..
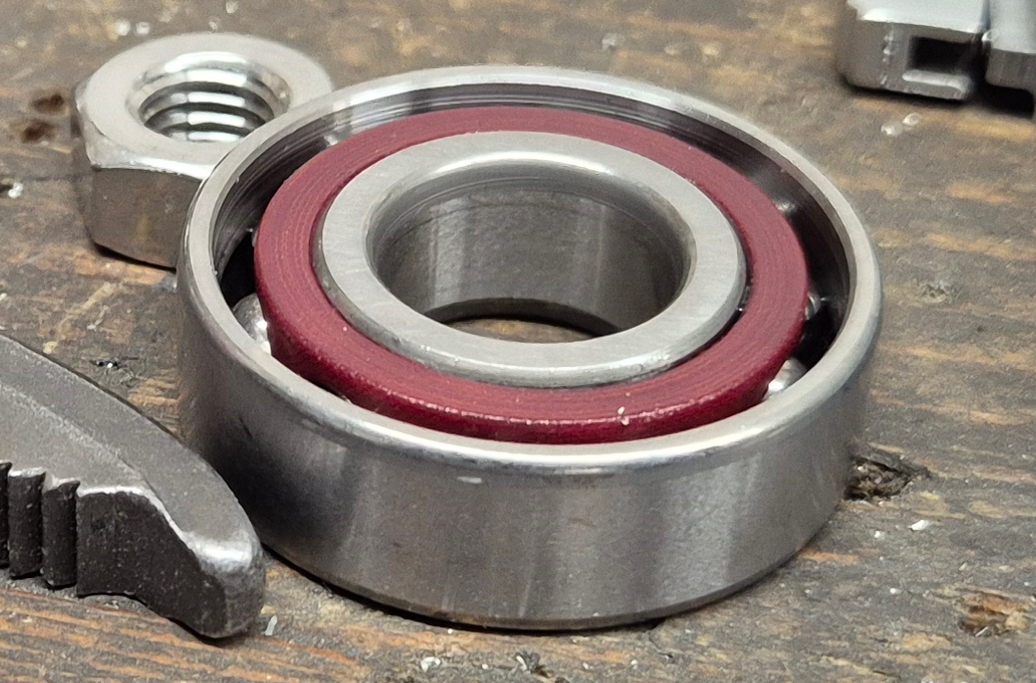
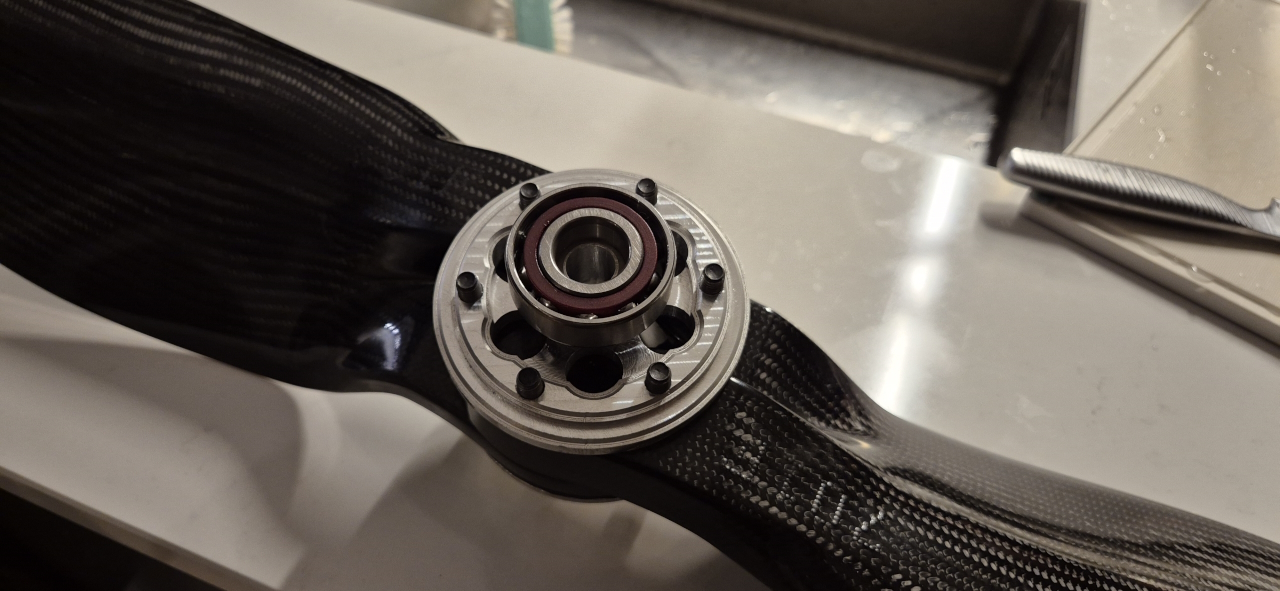
I found a couple of angular contact bearings and updated the CAD with the new dimensions. The parts I needed to modify was the support-bearing-mount and the propeller mount itself.
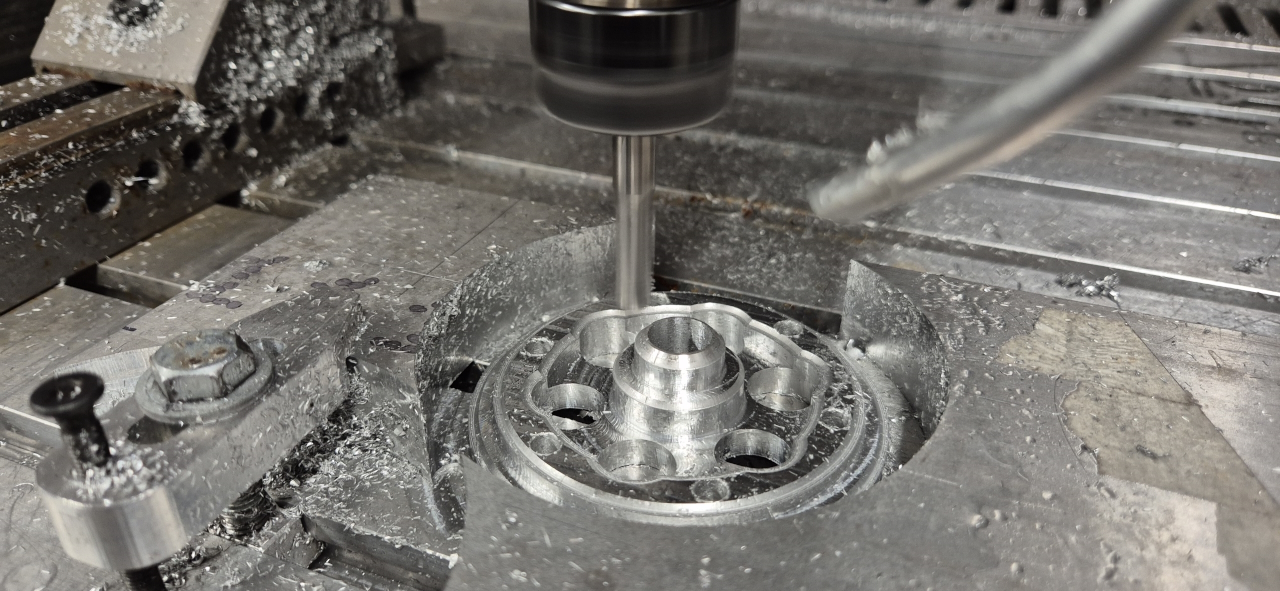
I had a little bit of problem getting the CAM to do what I wanted it to, but after some struggle it turned out great.
Since i broke the millbit I usually use for aluminium I had to replace it, and MAN was that old bit dull. Quality is superb after replacing it and the part turned out so good it’s a shame it’s going to hide behind the propeller so it wont be visible!
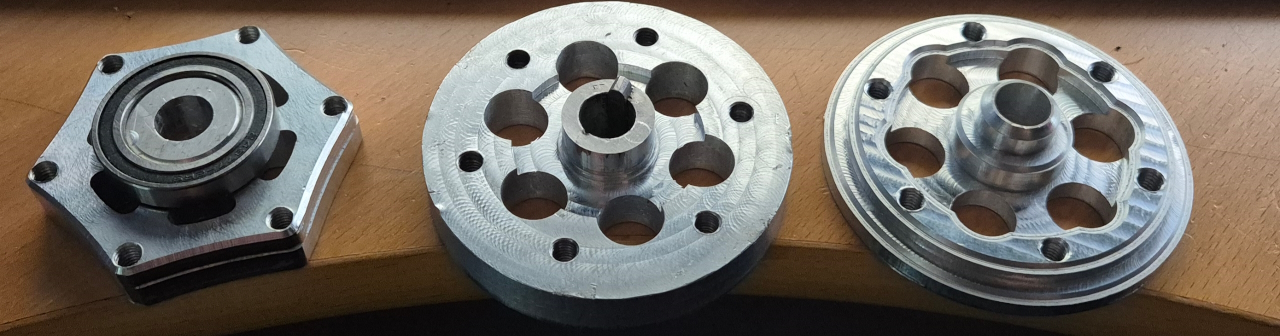
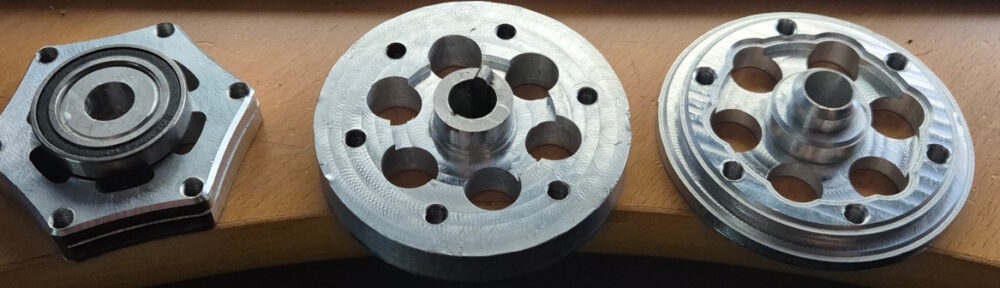
This is progression in the garage. Version 1,2 and 3 of the propeller mount. Version 3 is the lightest by far and less weight is good weight..
Since I’m doing a DIY project I wanted to make a throttle that I like. The ones I’ve seen online are far to bulky to fit with heated gloves in the winter and kind of annoying too. I started off with a regular e-bike hall-sensor trottle, designed a new lever for it and built a handle.
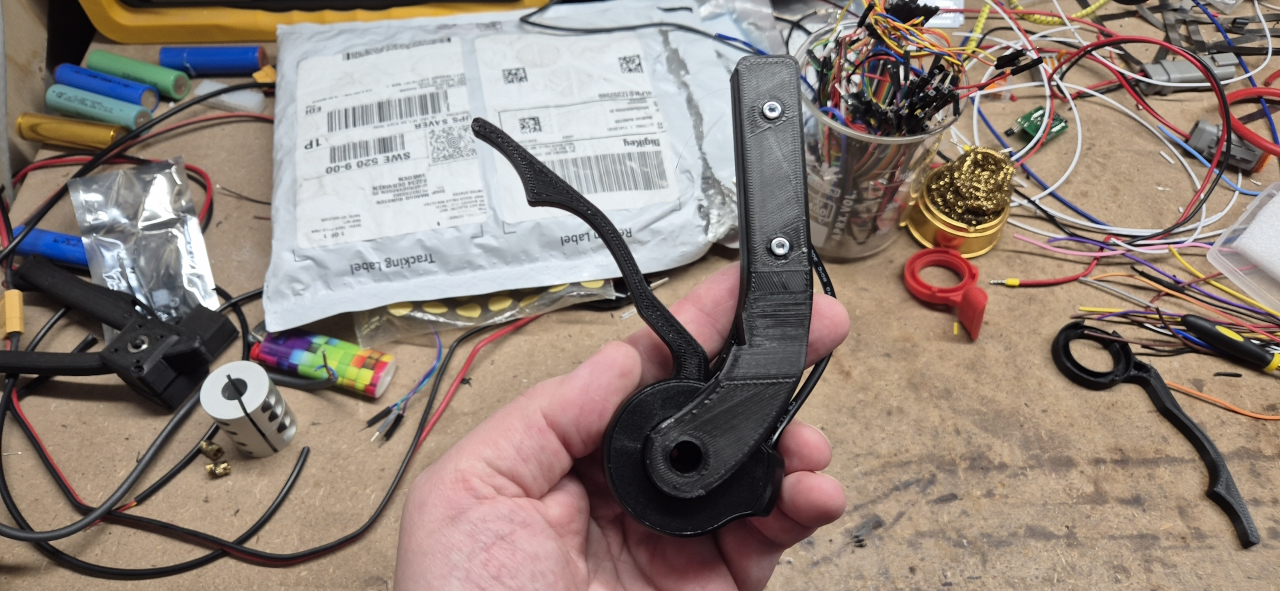
It’s still a work in progress. Going to fit a couple of buttons and the display on there too.
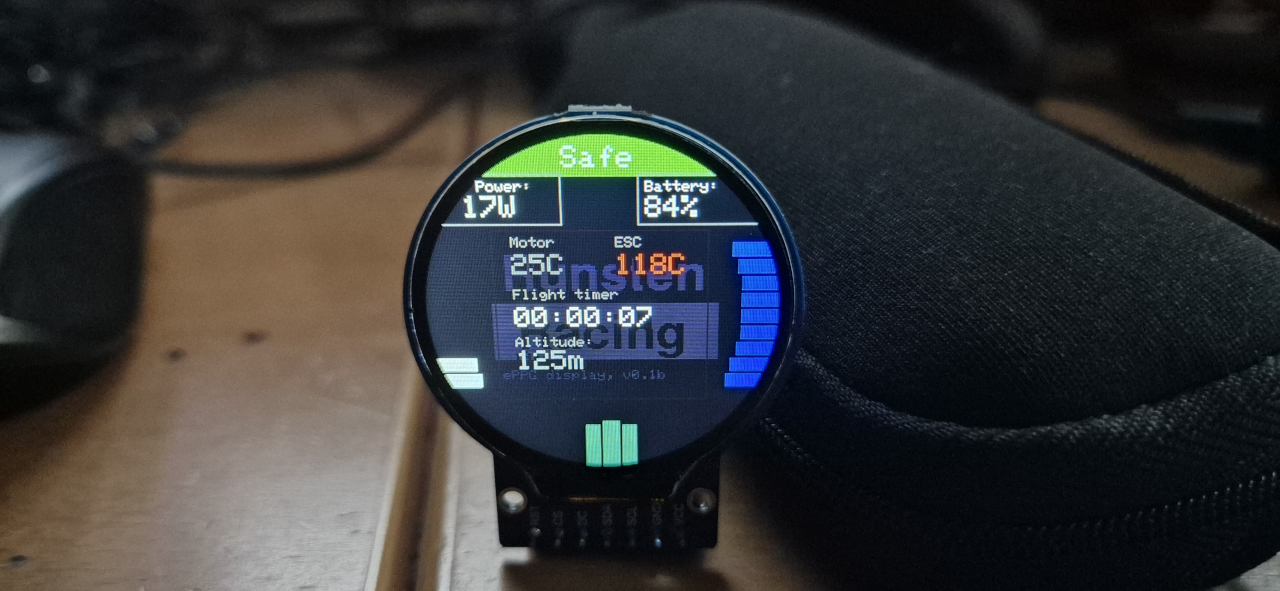
The display is a standard 240×240 display from Amazon. I’m using an ESP32 to run all the functions like arming, cruise control, battery state monitoring and so on. The plan is to implement functions for remote activation of beacons and maybe different power levels. That’s on the todo-list anyways.
Since I’m using an ESP32 it will be possible to implement wireless control. Just adding a battery to the throttle could make it so the cable between the throttle and ESC isn’t needed. I’ve considered that option but don’t know the reliability of the wireless connection in the environment we’ll have. Starting off with a wired controller, wireless is a later option after loads of connectivity testing.
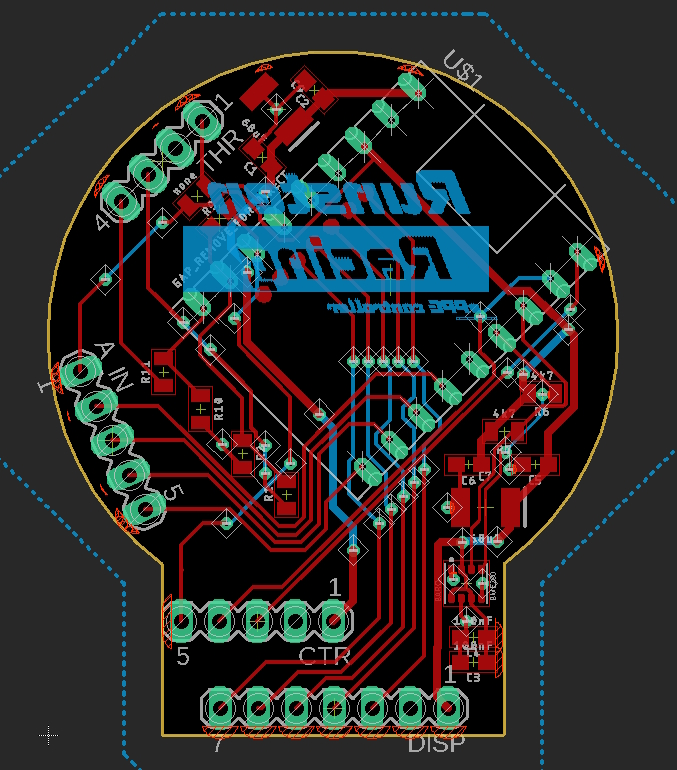
For those of you that are into PCB design, here’s a screenshot of the control-board before pouring the ground plane. I’ve added inputs for 2 buttons, made options for controlling the FarDriver directly via the throttle or through the processor. I also added a barometric altimeter to the PBC to be able to get current AGL and temperature.
Well, that’s all for now..
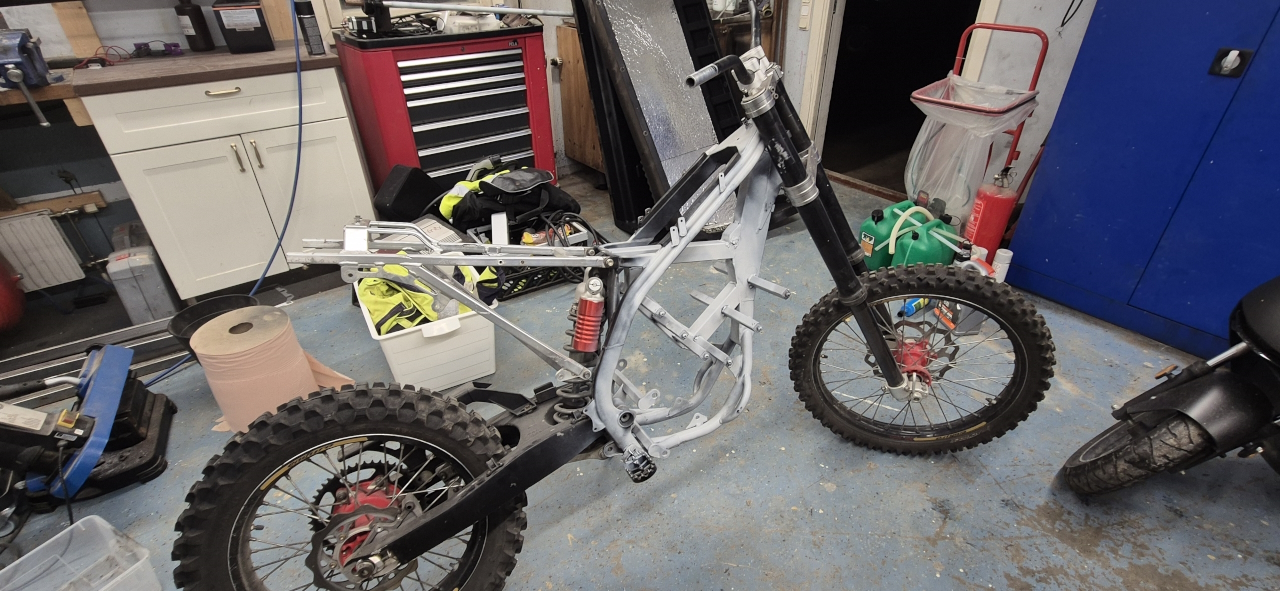
I’ve also finished the battery mounts on the NoGas project, and primed it for paint.
We needed a shoe rack but all my 25mm tubes were rusty, so I built something like a lathe to remove the rust from it.
And I’ve bought a snow blower to fit to the Avant.. currently designing electric control for the turret on it.. but more on that in another post.
More to come, hopefully soon.