XXL Avant conversion “complete”

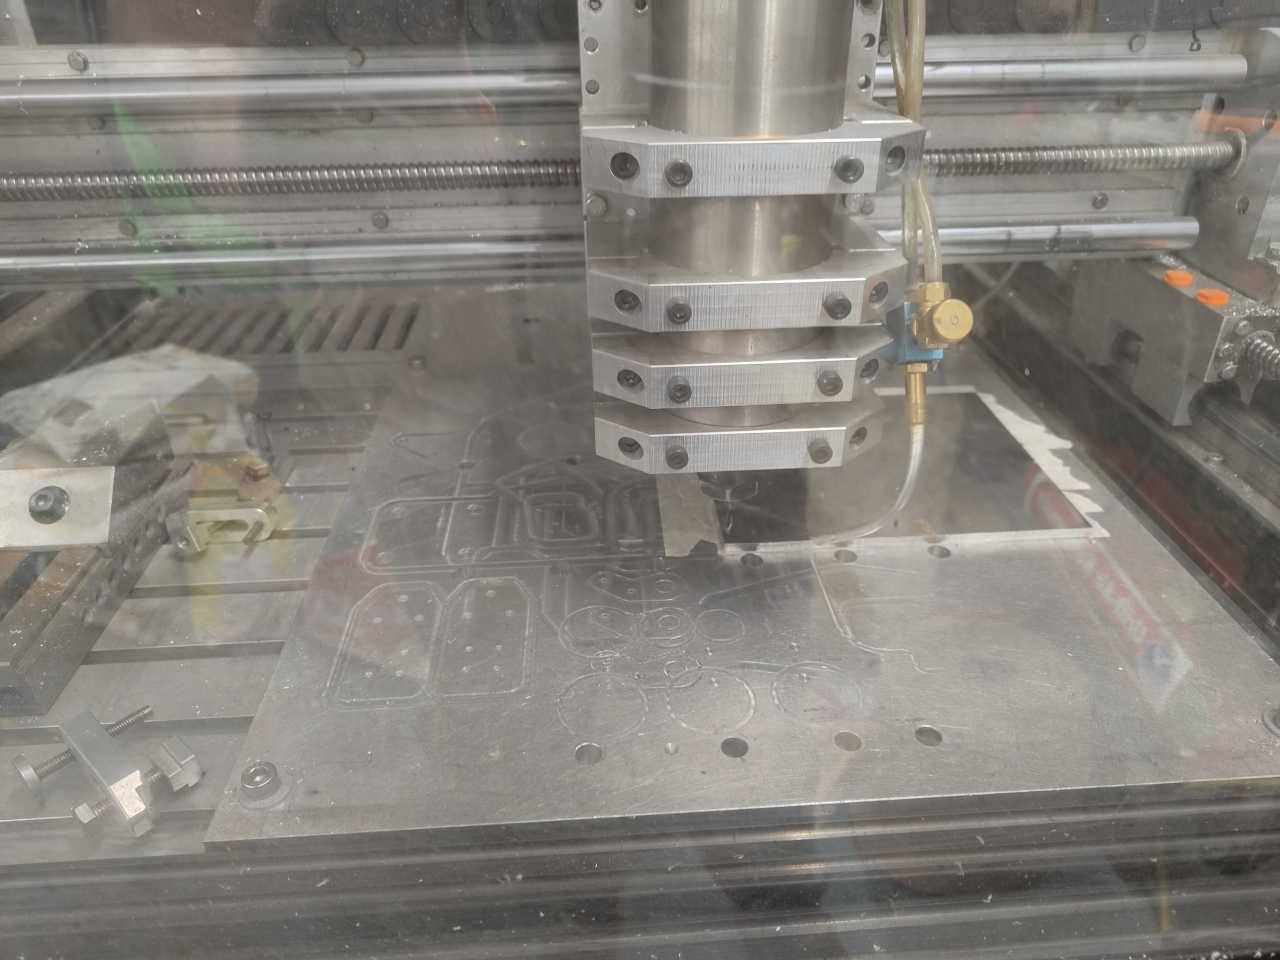
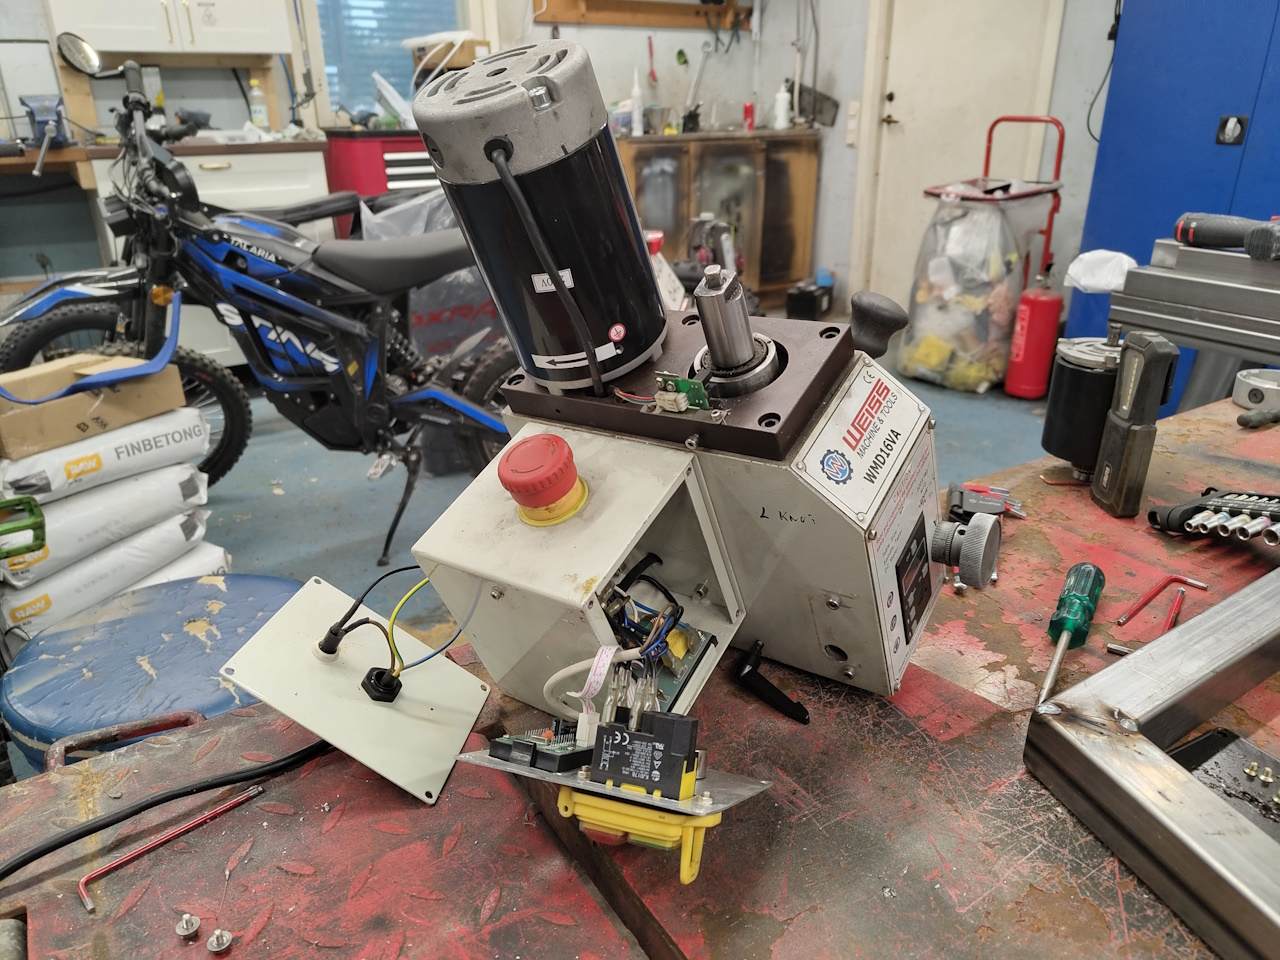
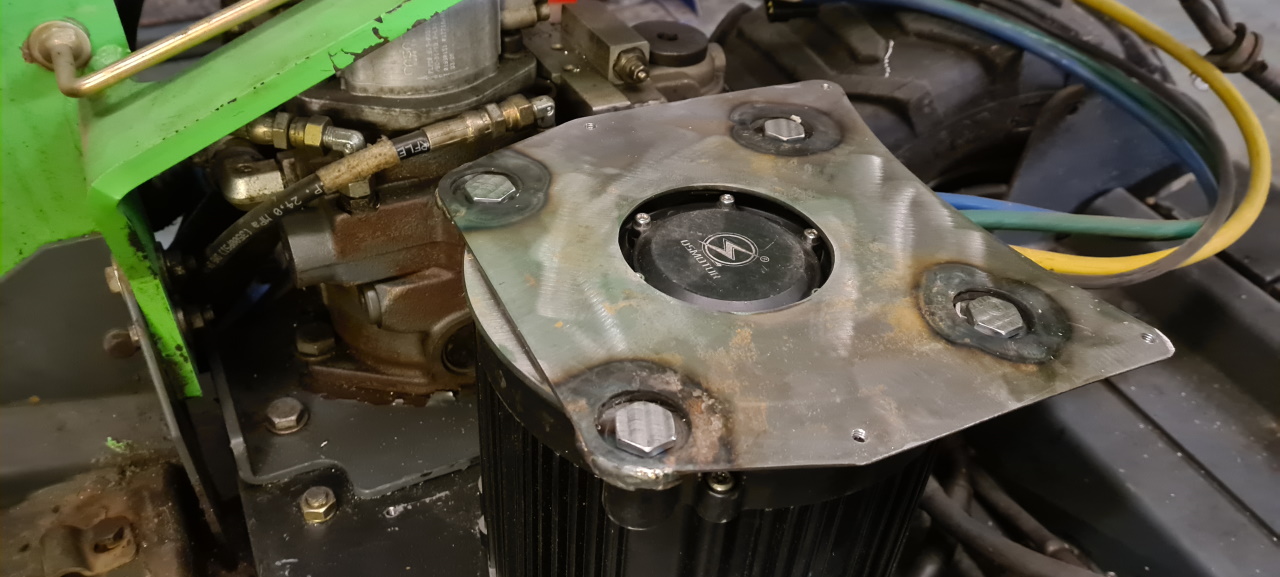
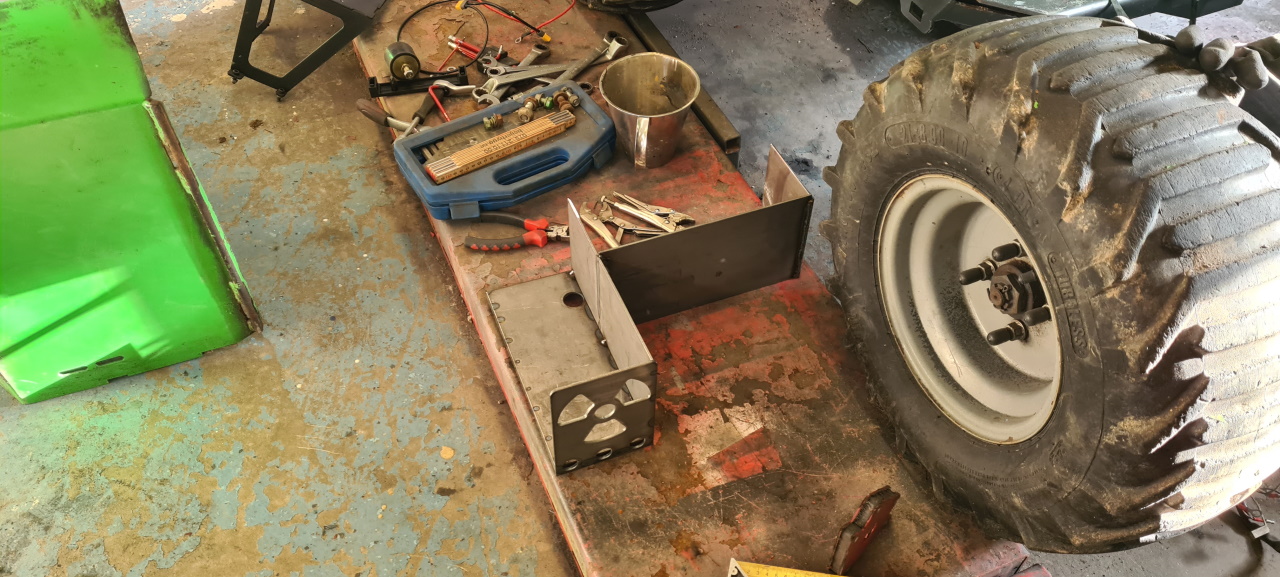
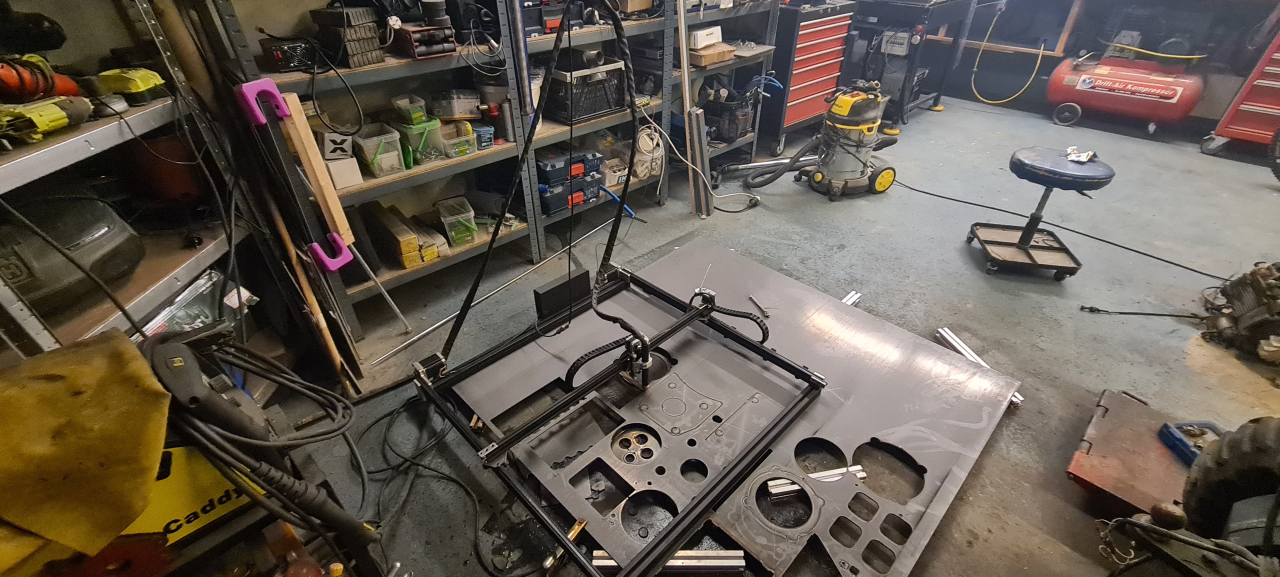
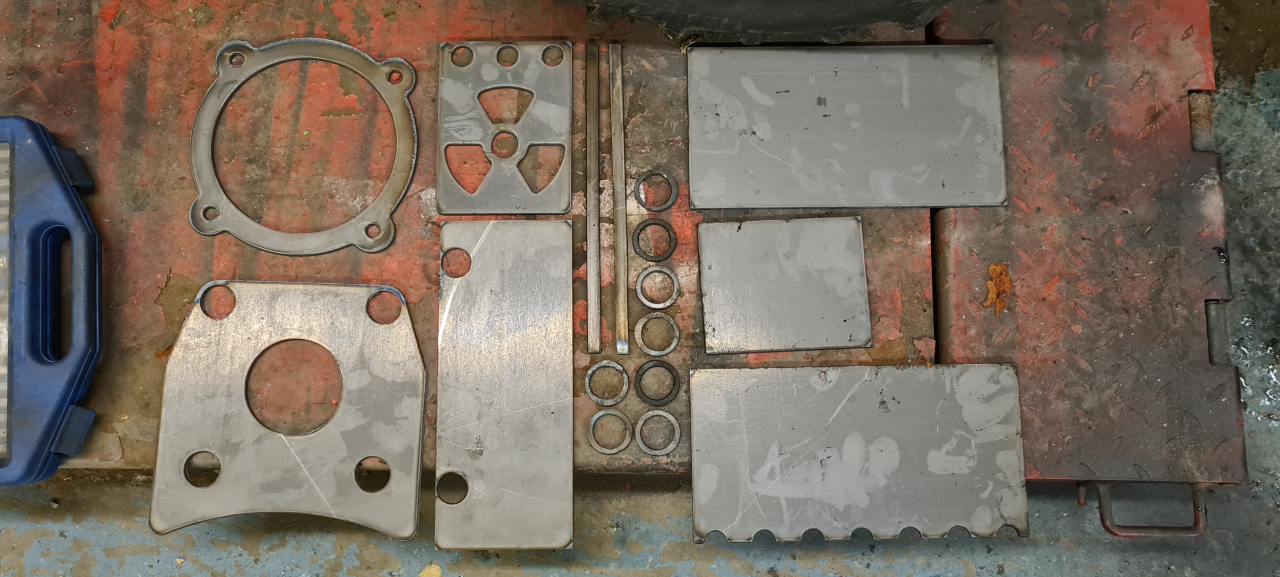
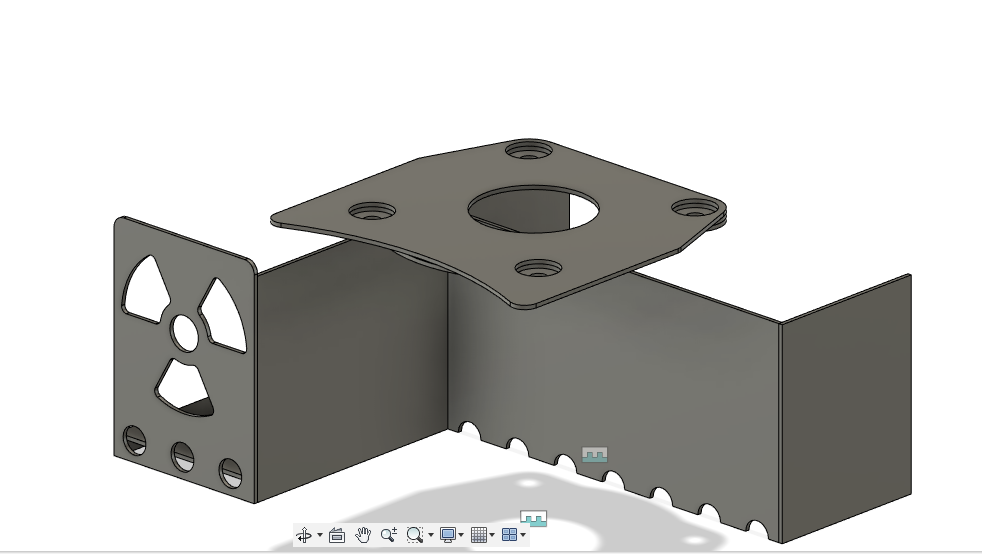
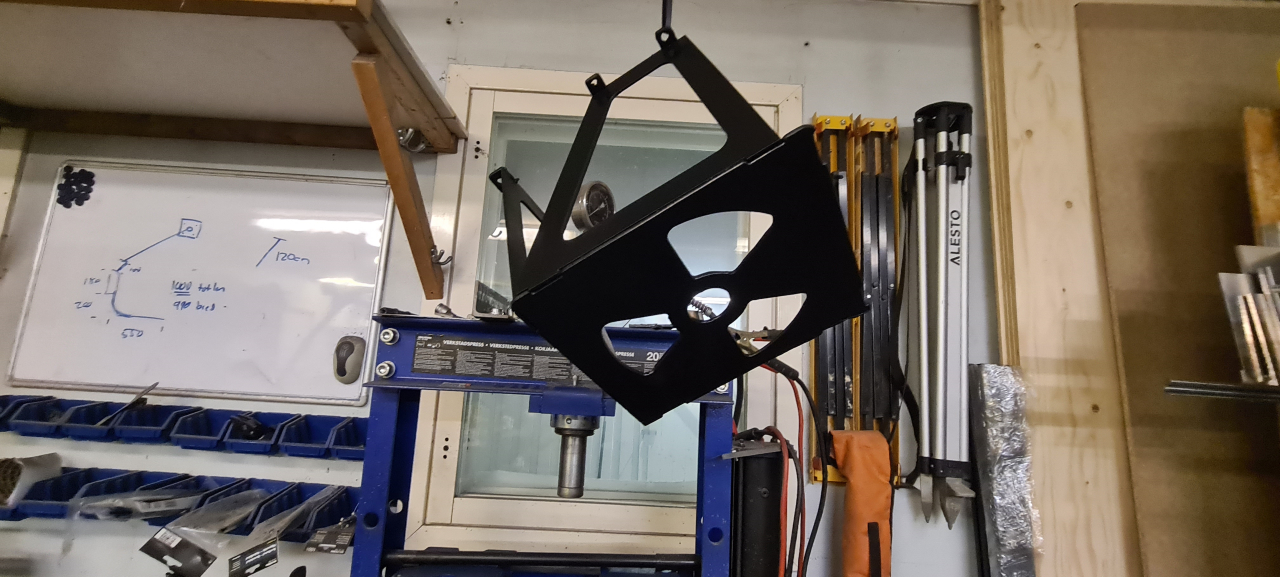
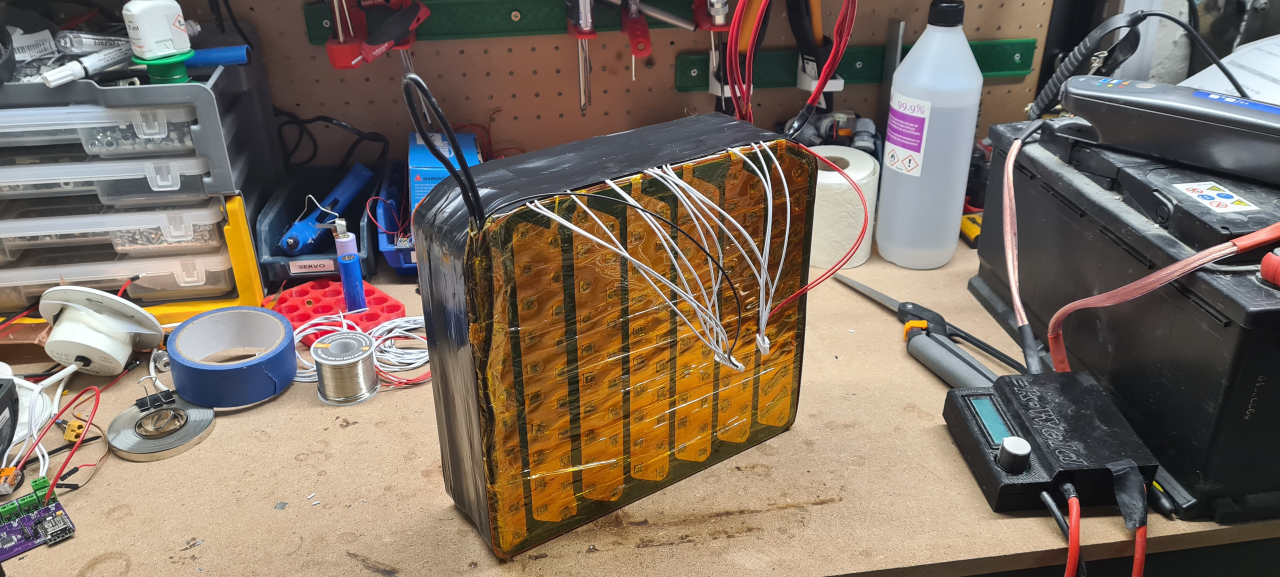
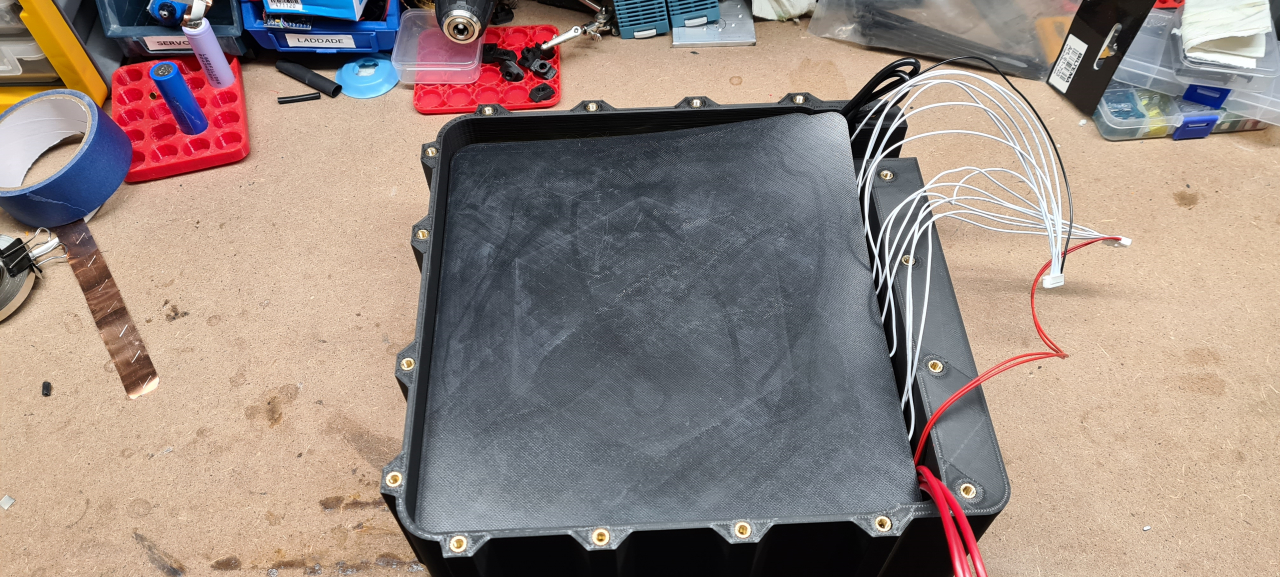
So, after having made the physical conversion with the mounting plate all that was left was the electrical..

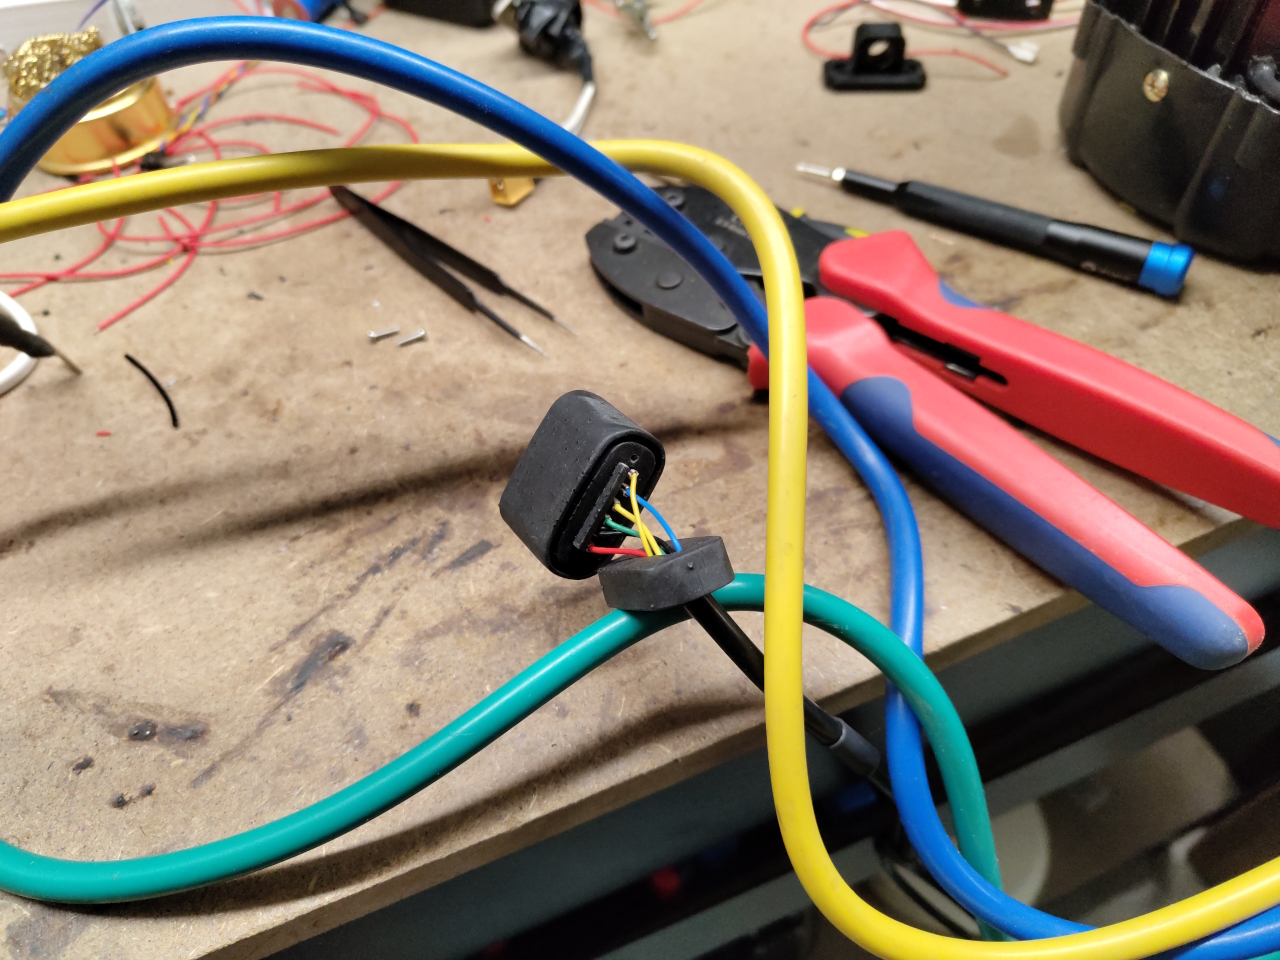
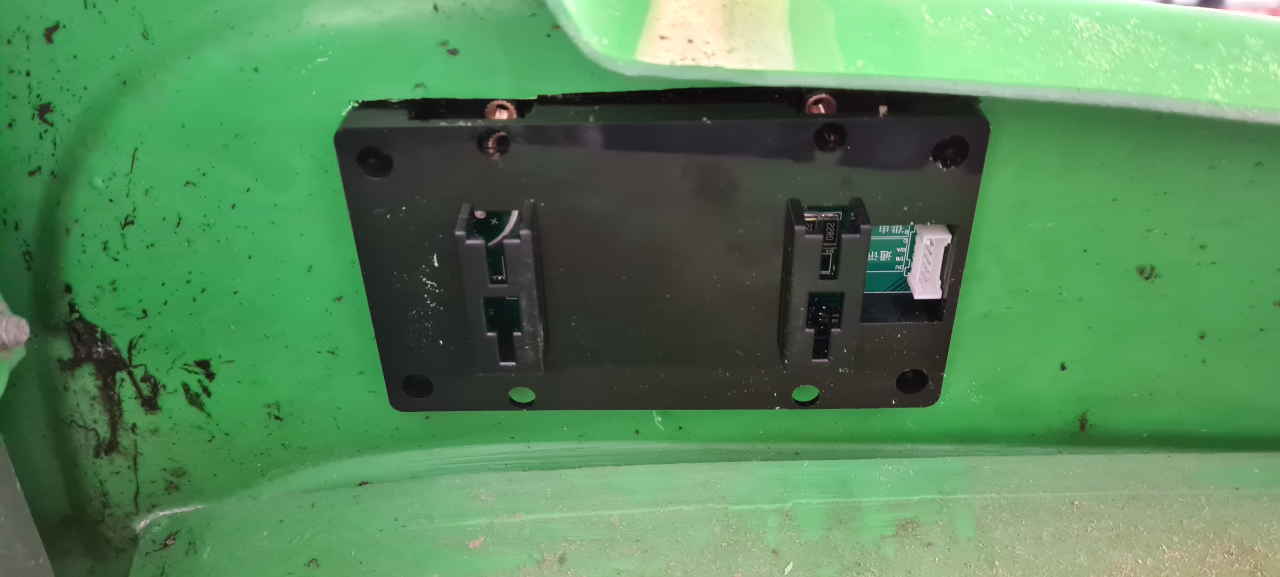
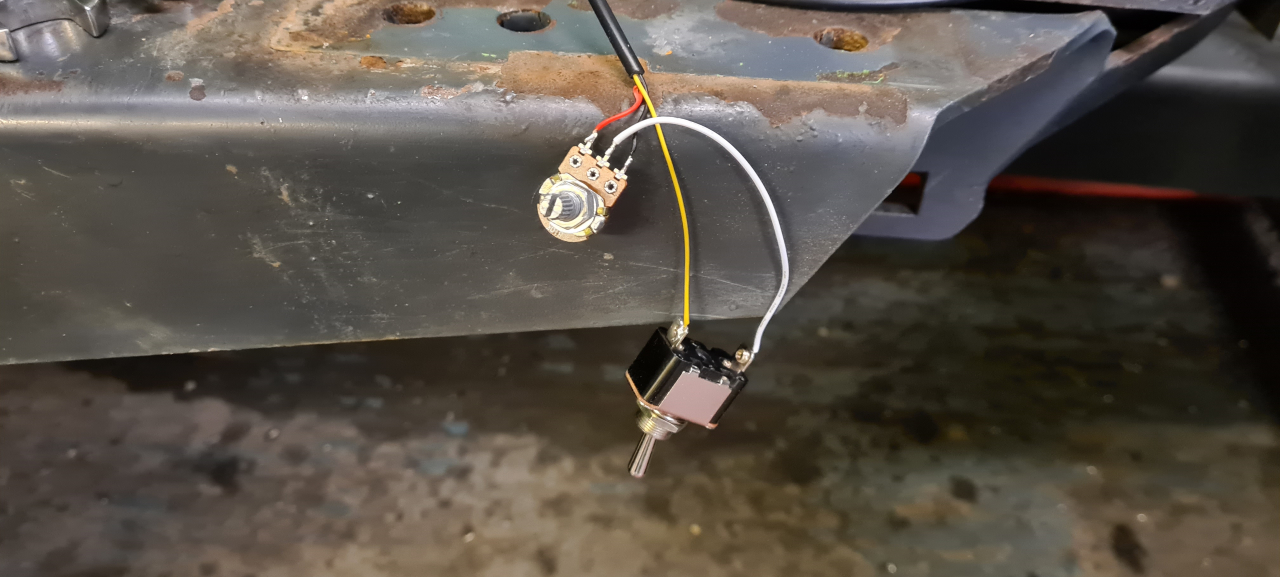
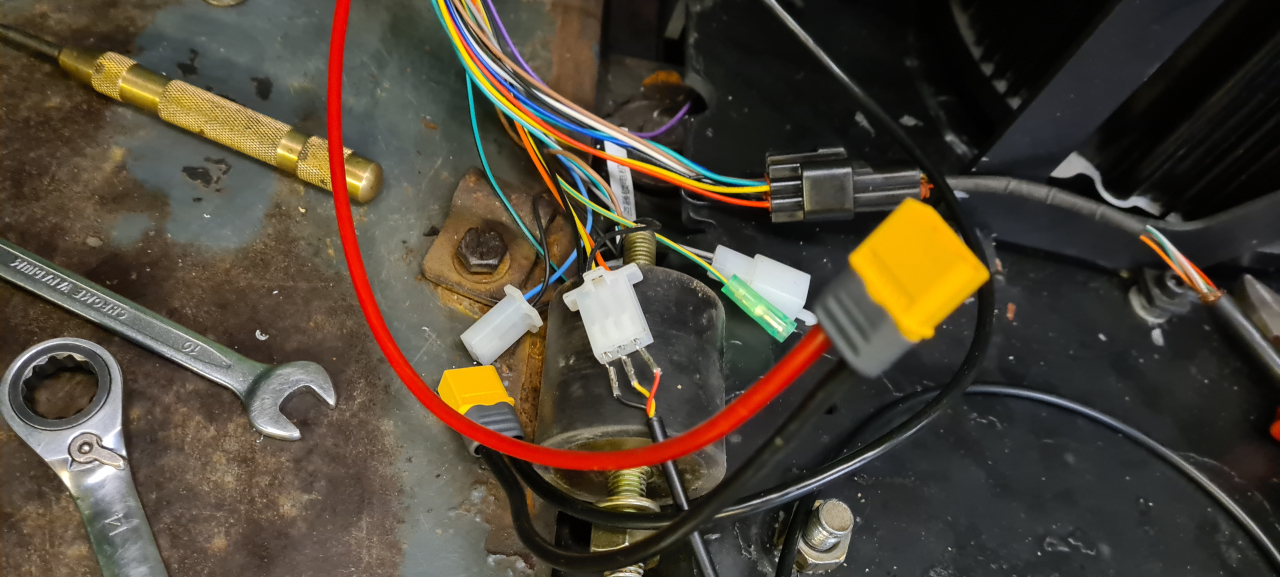
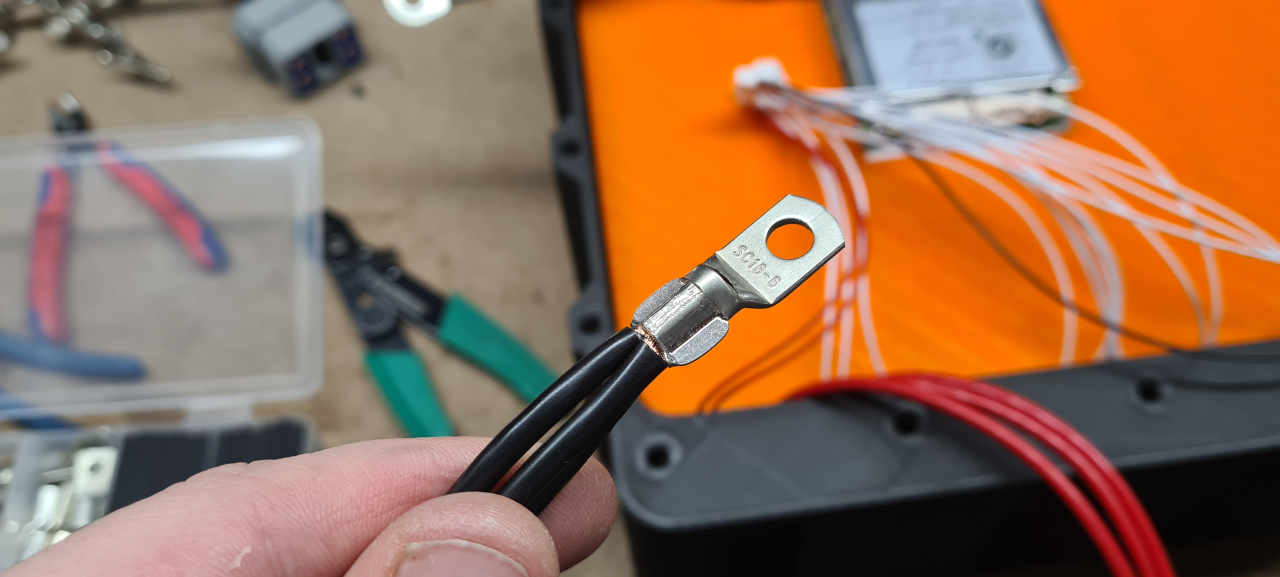
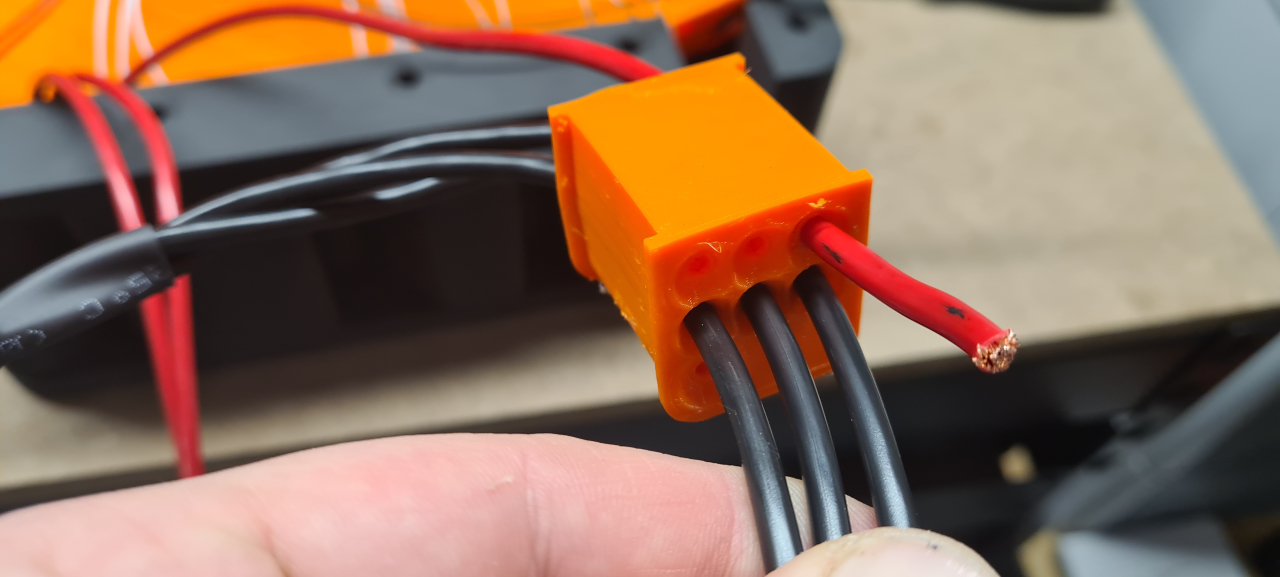
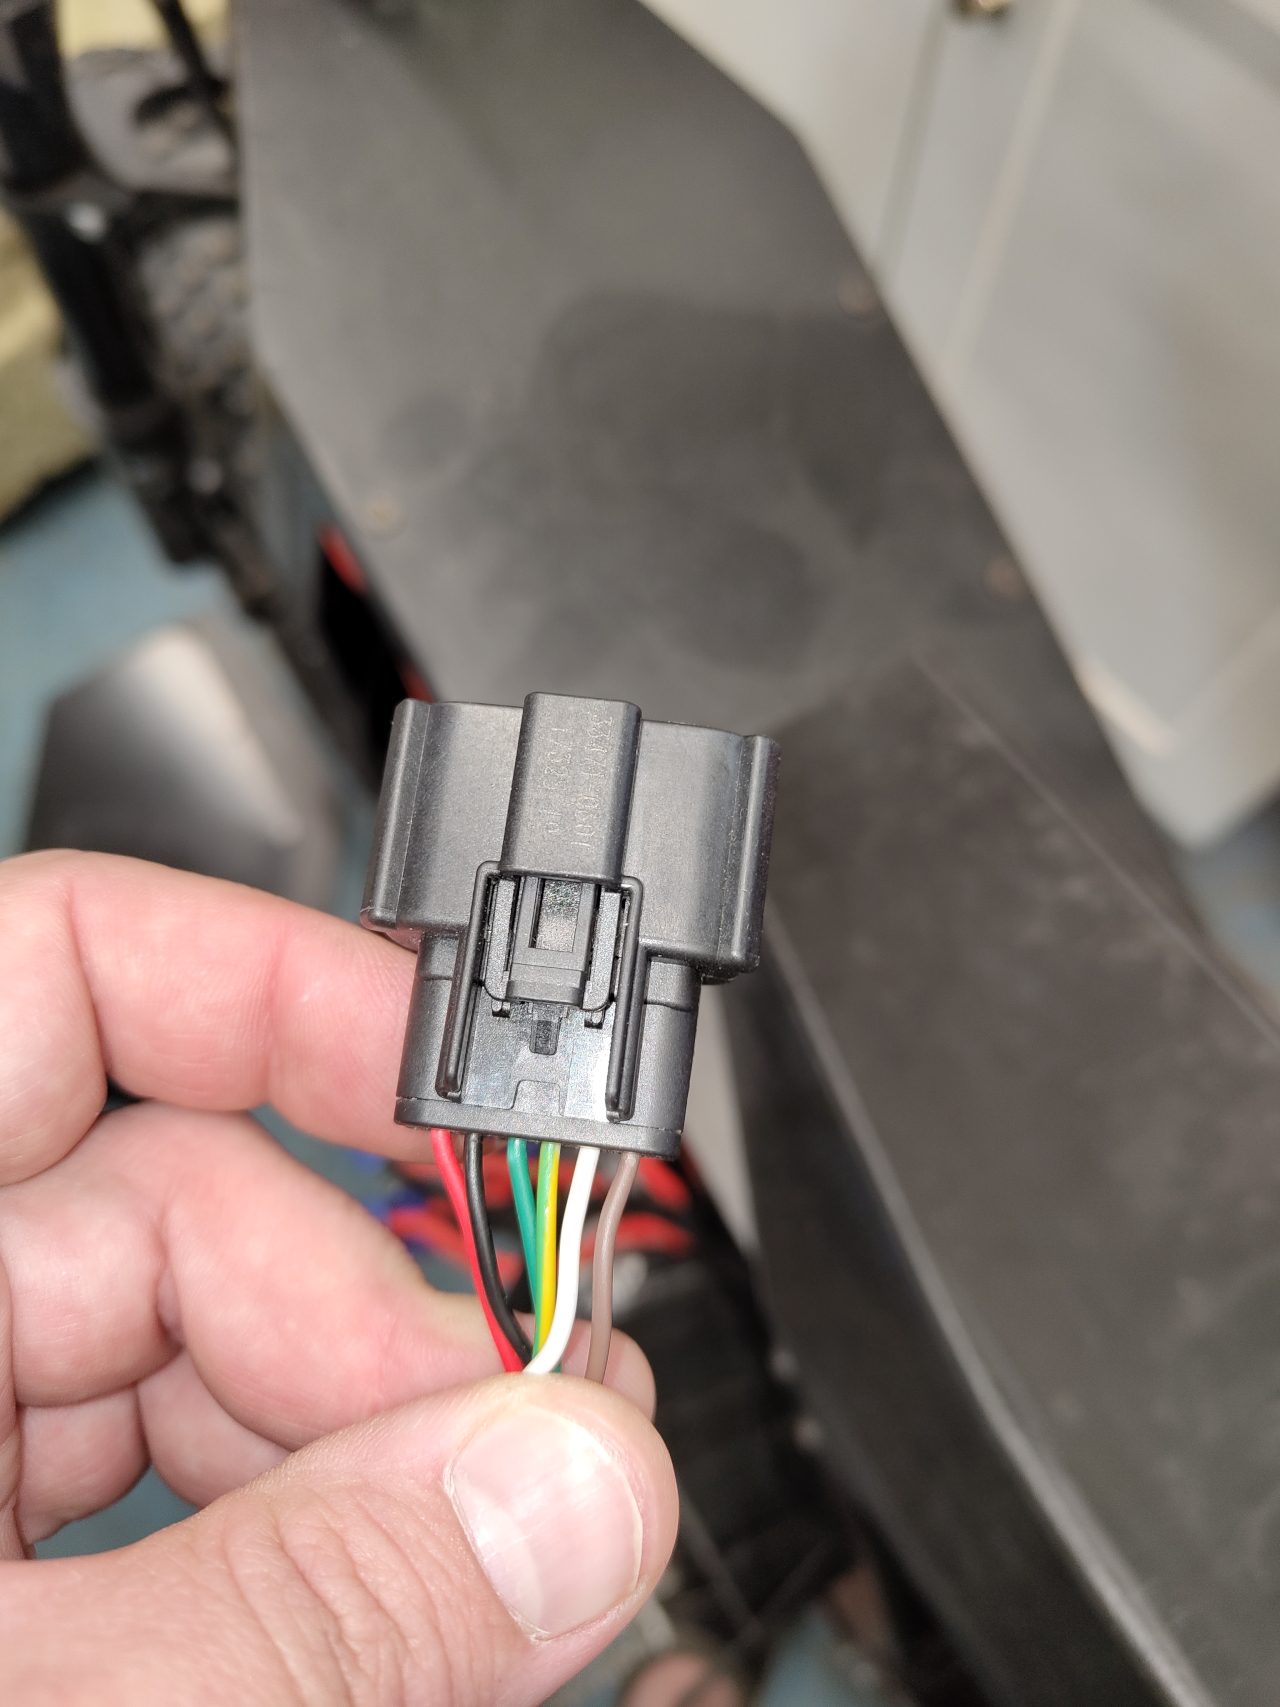
To fit the ASI BAC-series of controllers the hall sensors and thermistor needs a 6-pin molex plug. Those are super hard to come by. Sure, I could buy a complete adapter from the US, but that’d take far too long.. So I 3d-printed a molex plug, the crimp connectors I already had.

A resin printed plug with TPU seals will have to do. It’s pretty sealed and I could fill it with hot glue if needed later. Here I made a mistake though. I used the schematics for the BAC855 controller to deduce the pin numbers for the different hall sensors, and I got it wrong..

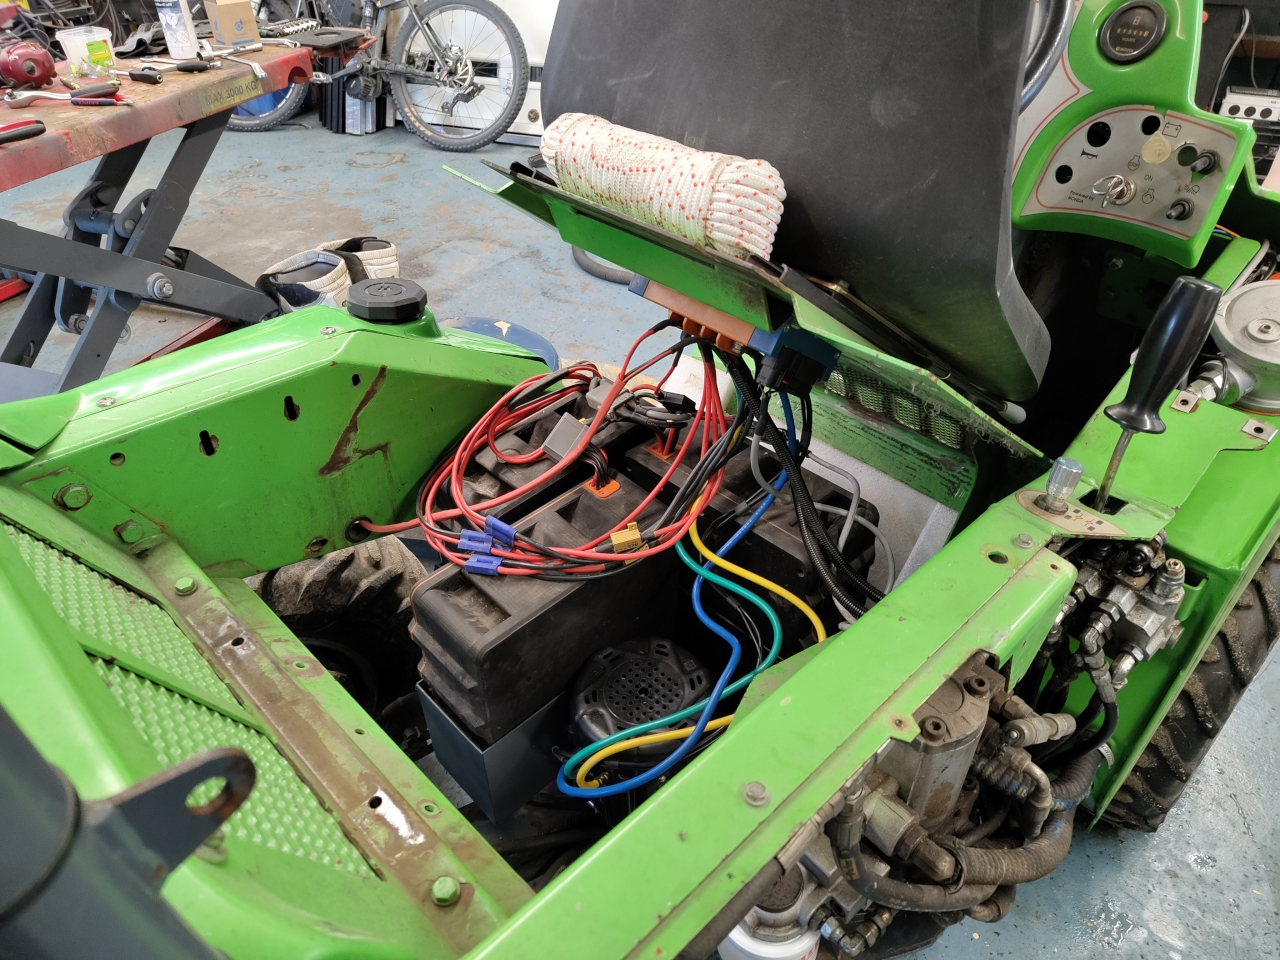
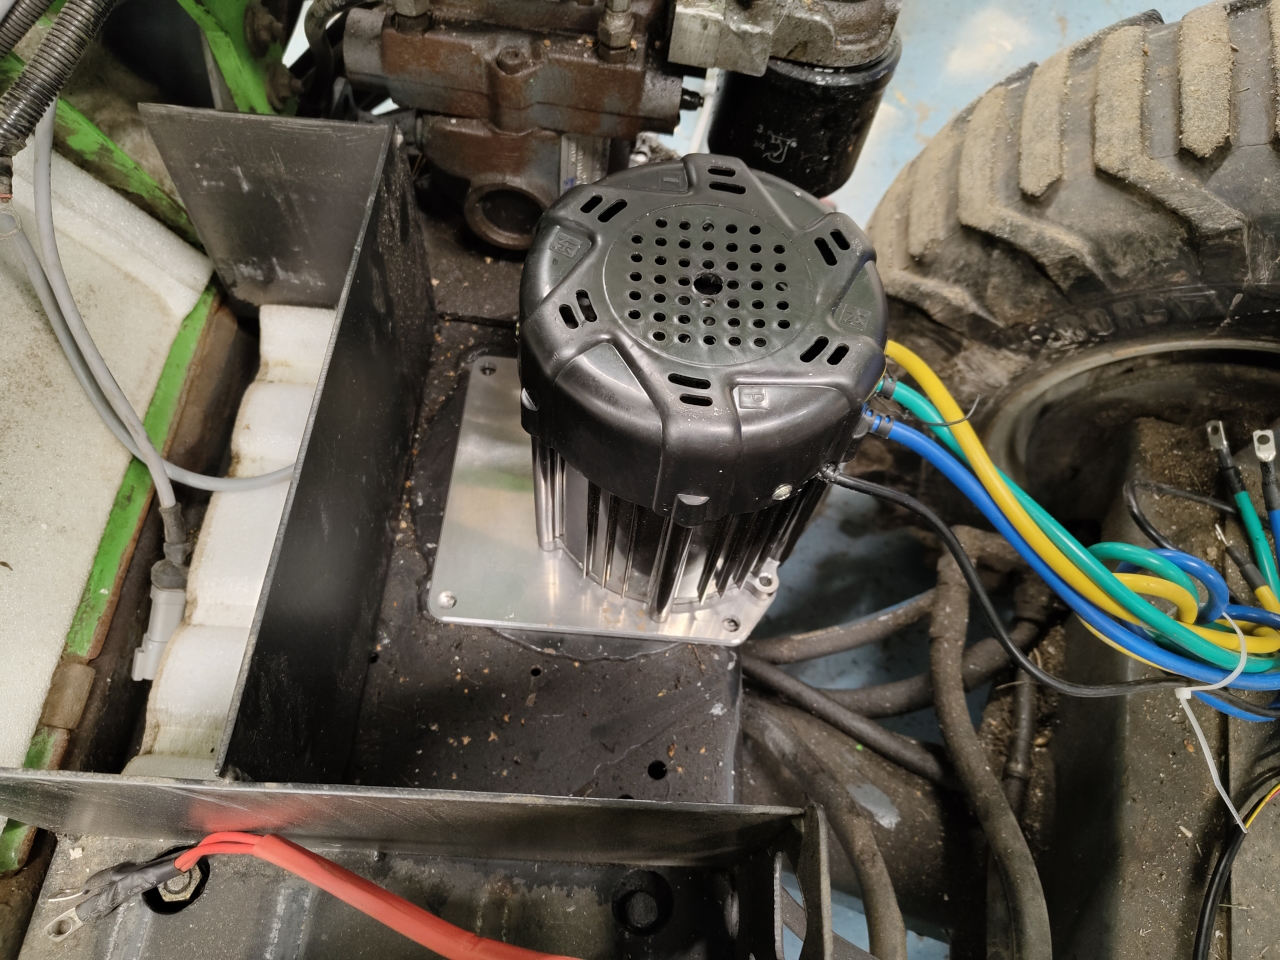
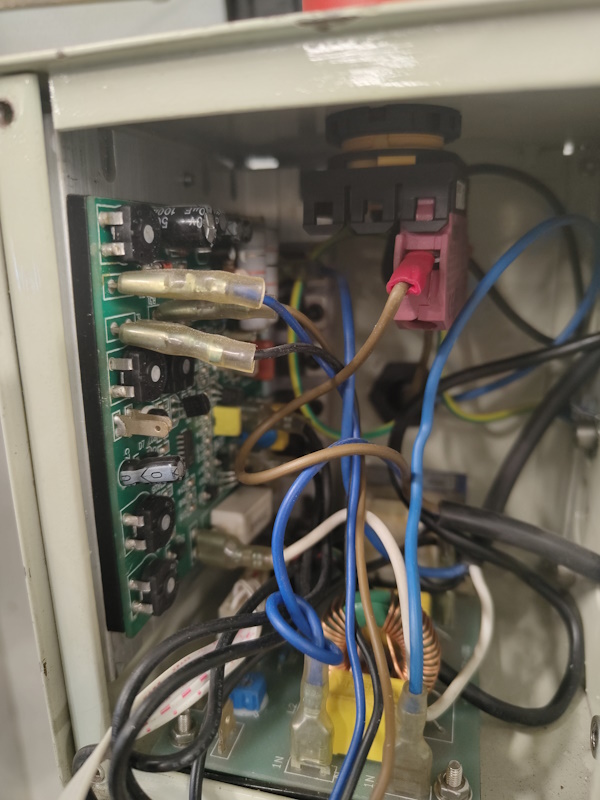
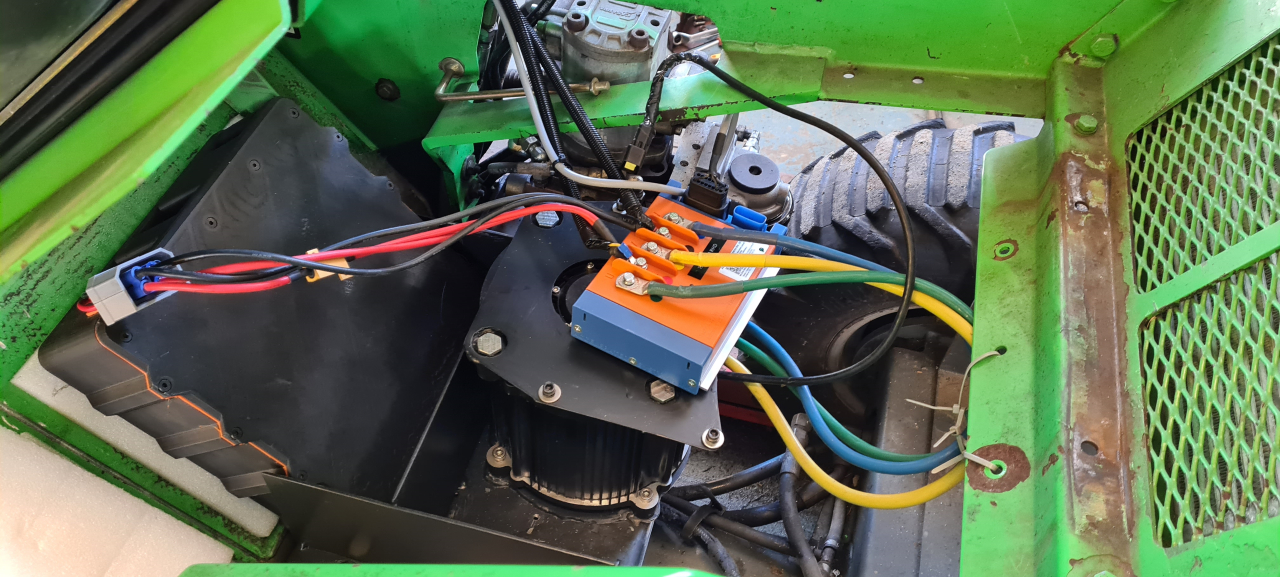
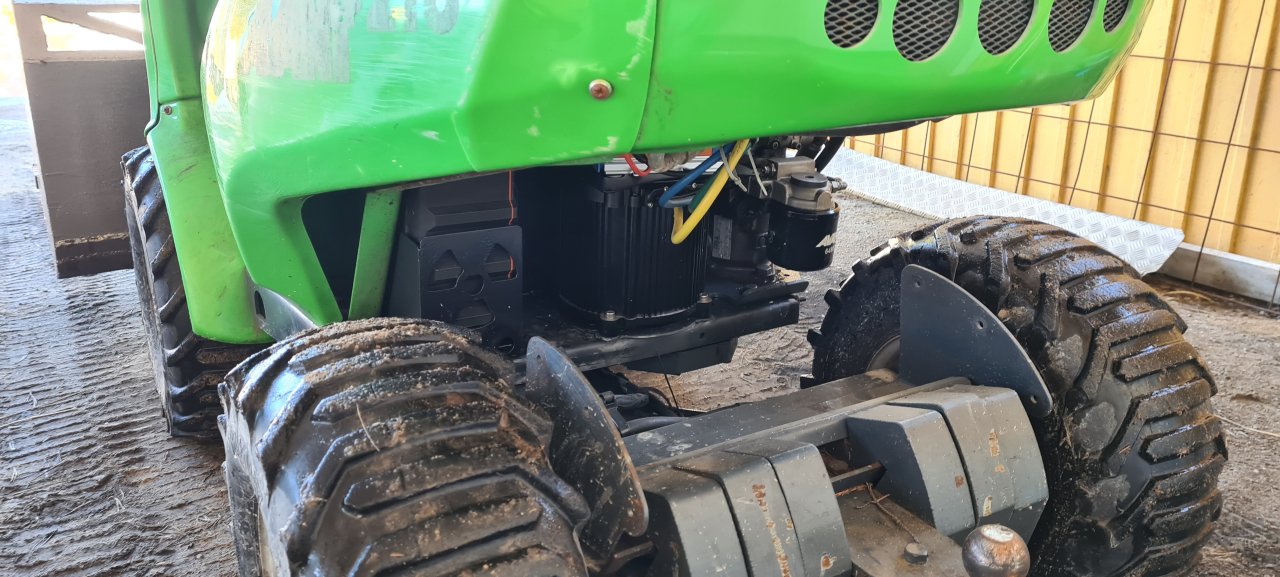
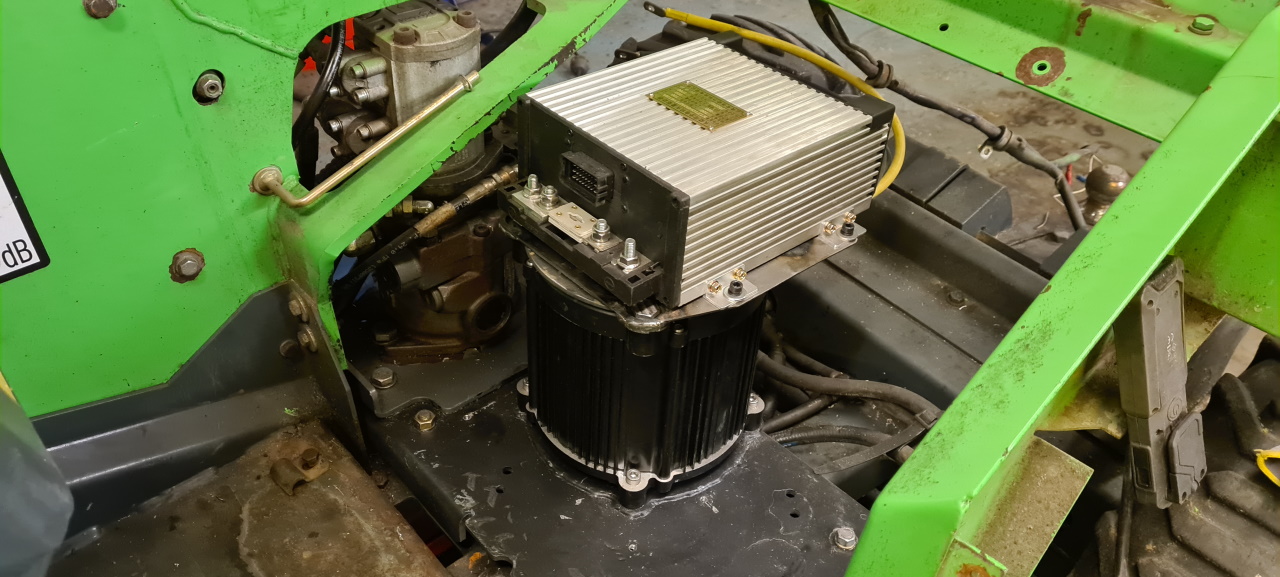
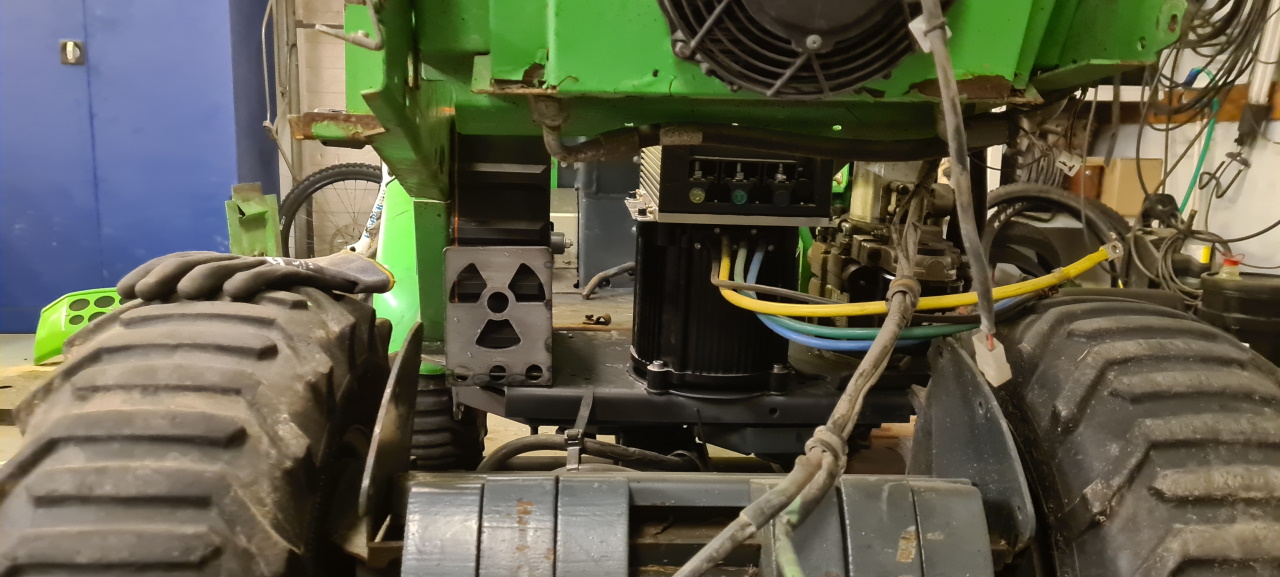
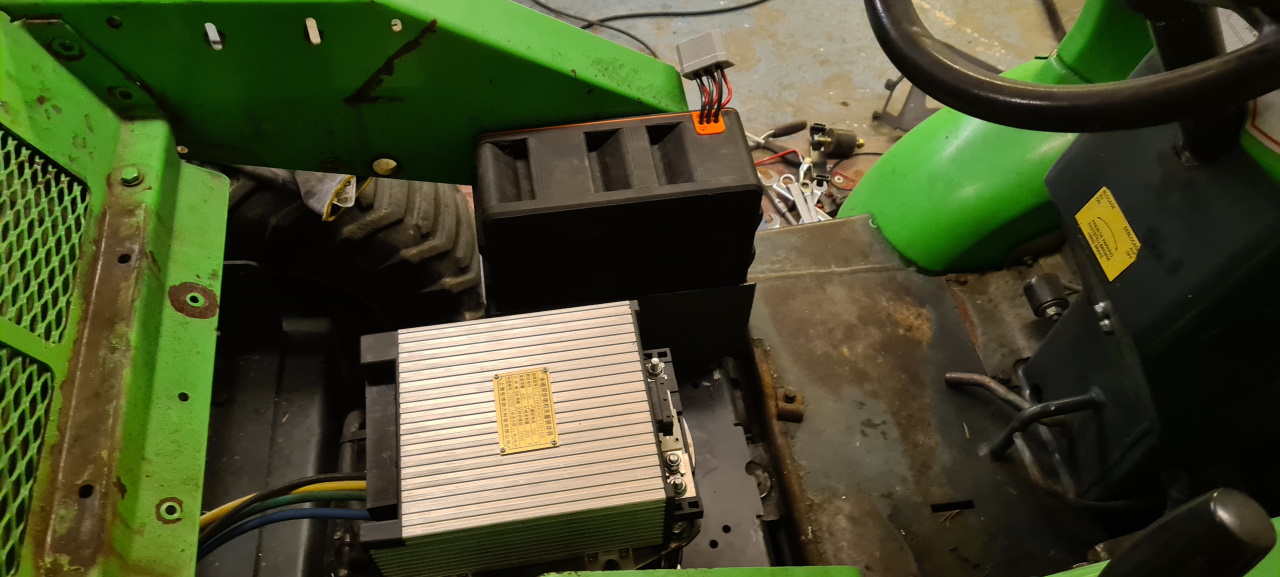
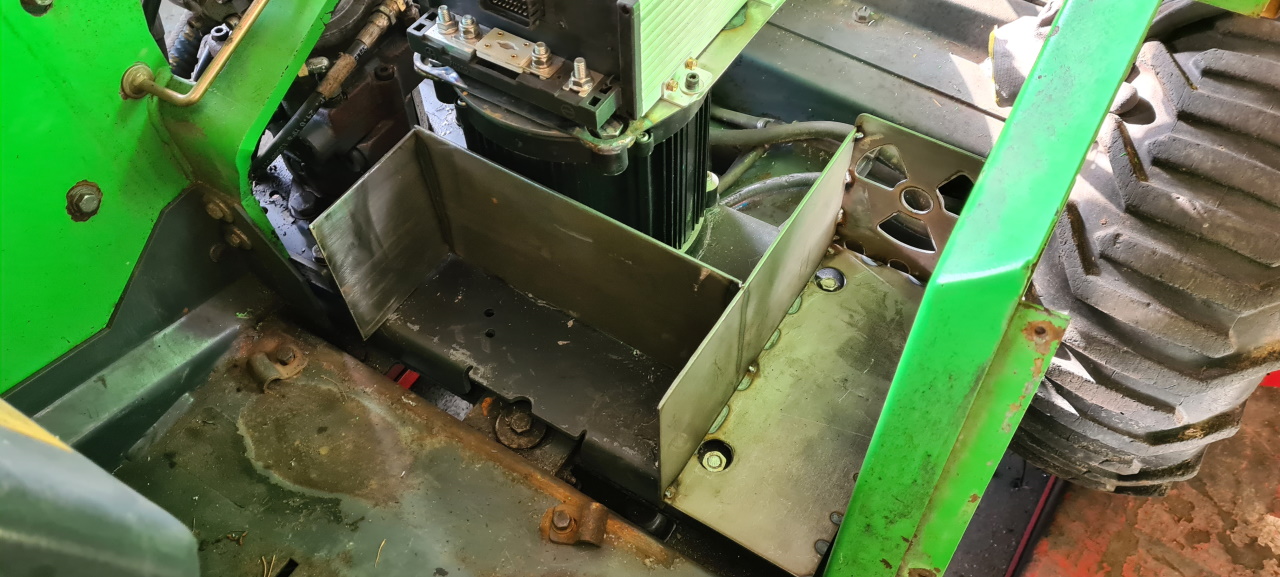
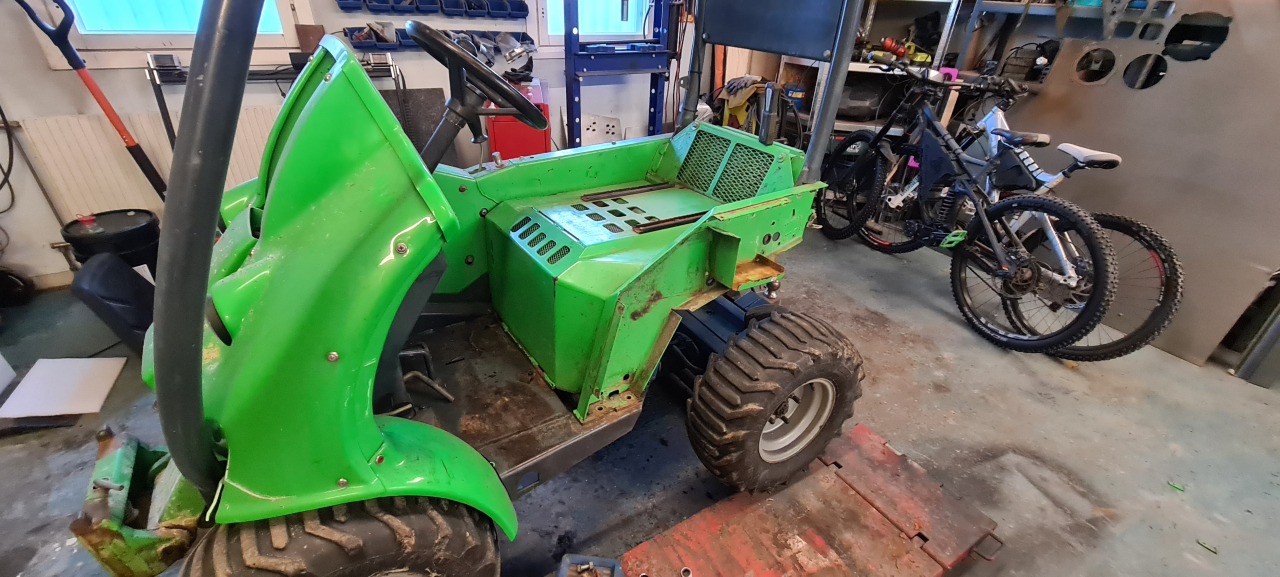
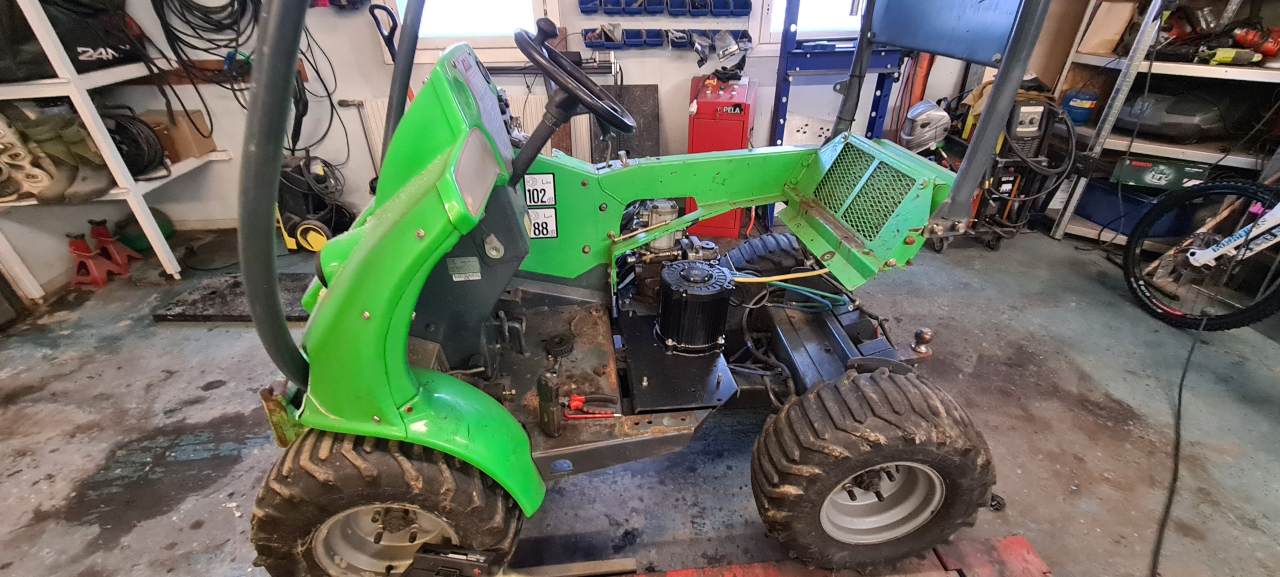
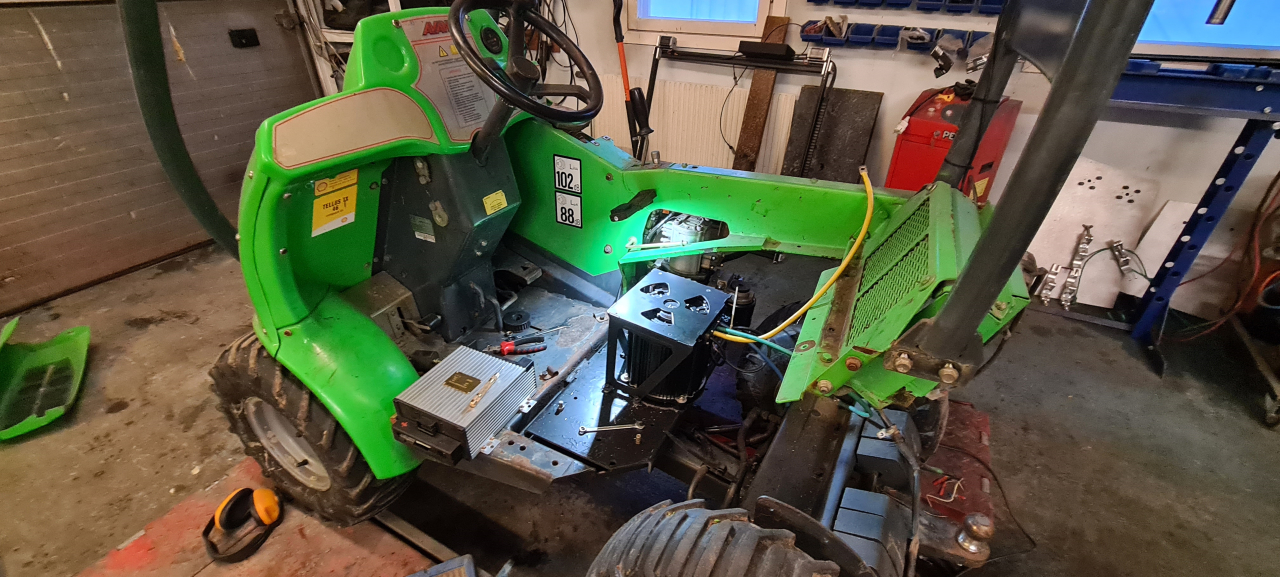
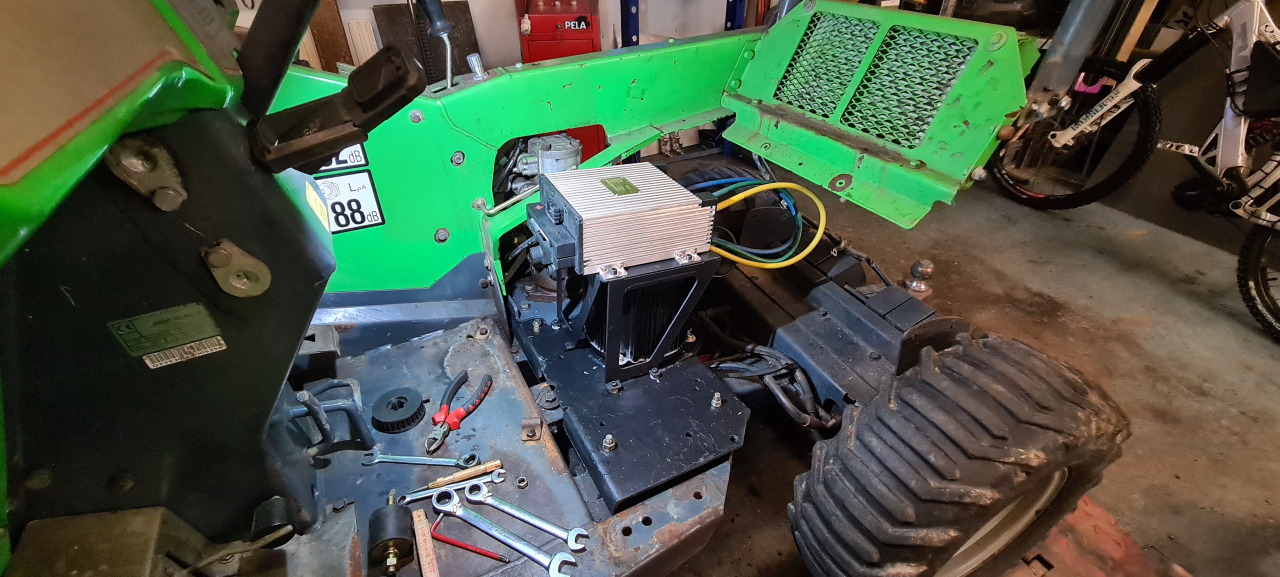
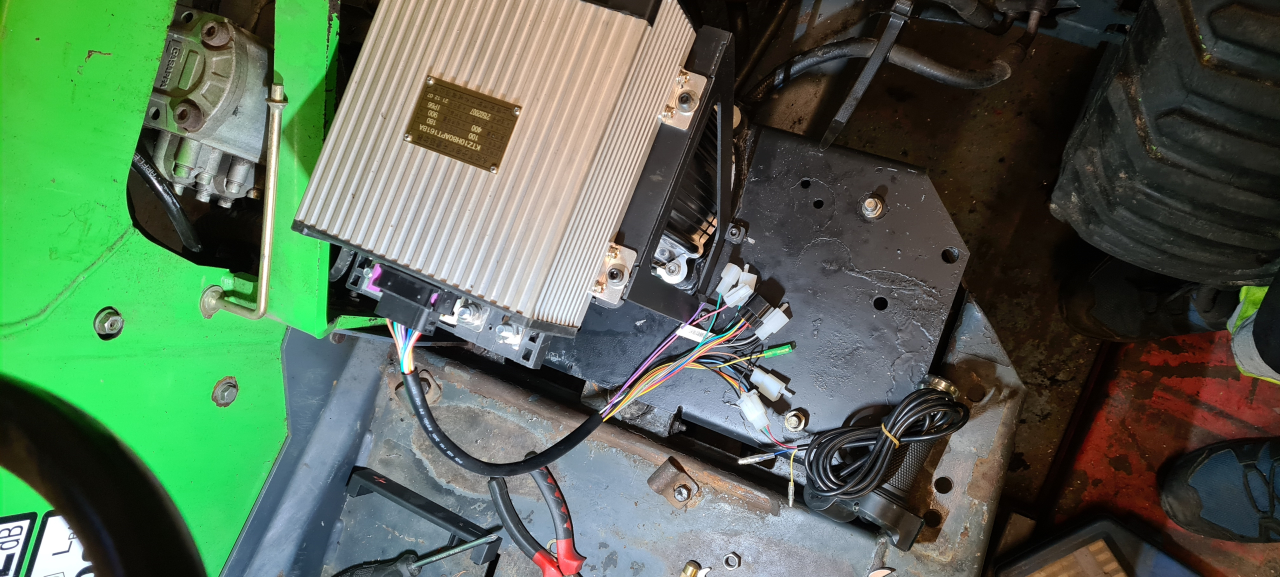
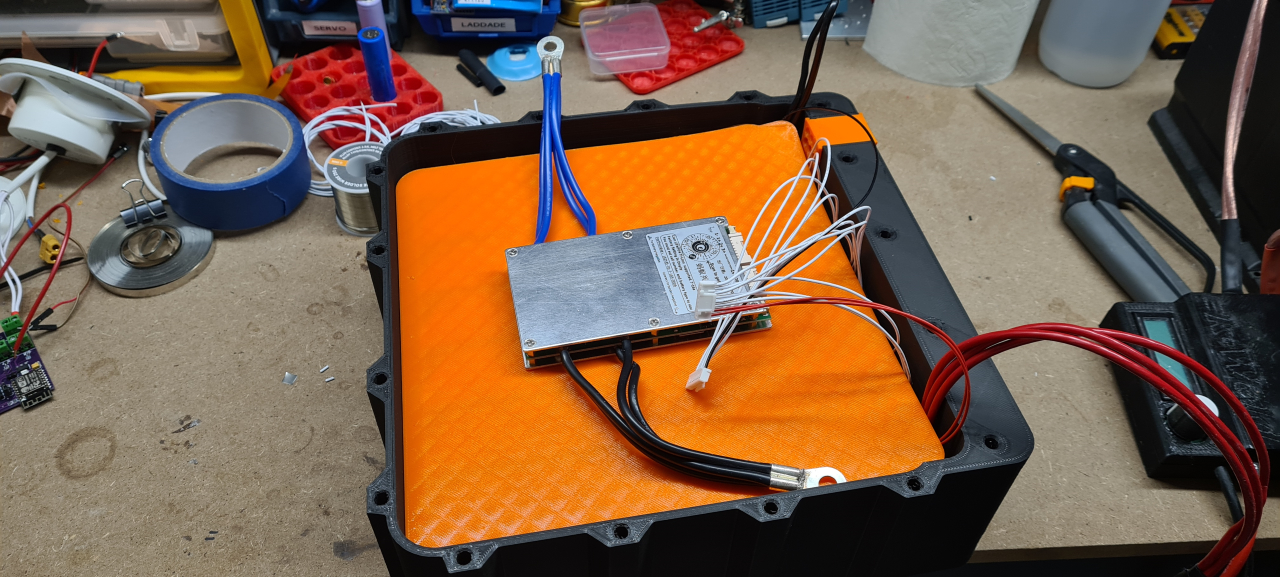
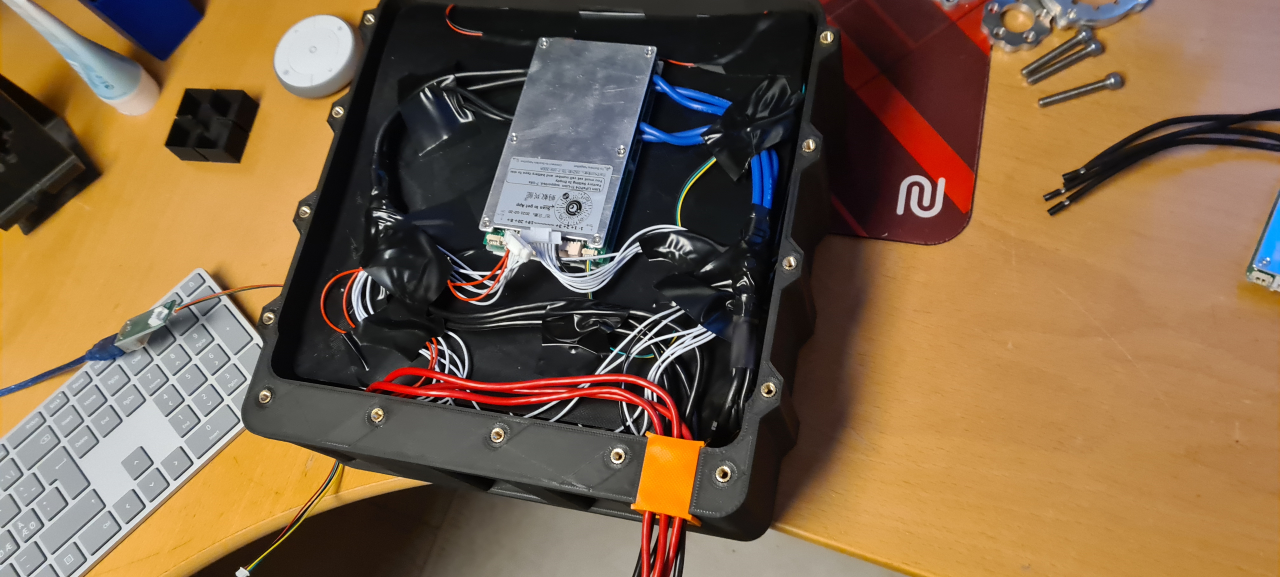
I opted to mount the controller under the seat instead of in the motor well. There it’ll be a bit more protected and it makes for a cleaner installation.. there is however far to much wire in the engine bay..

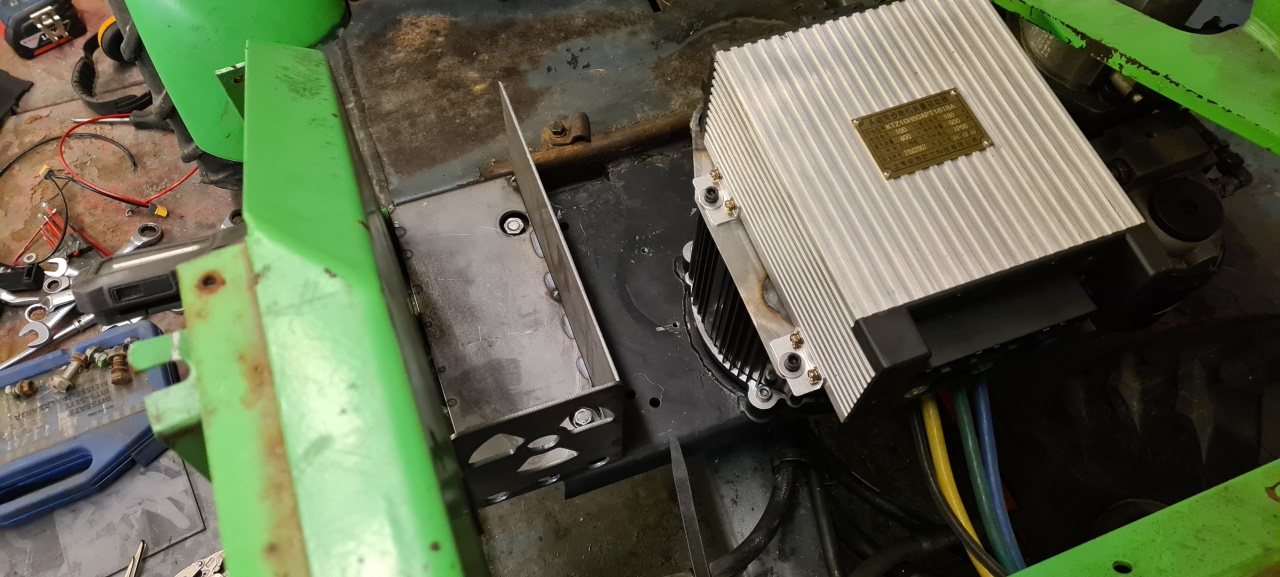
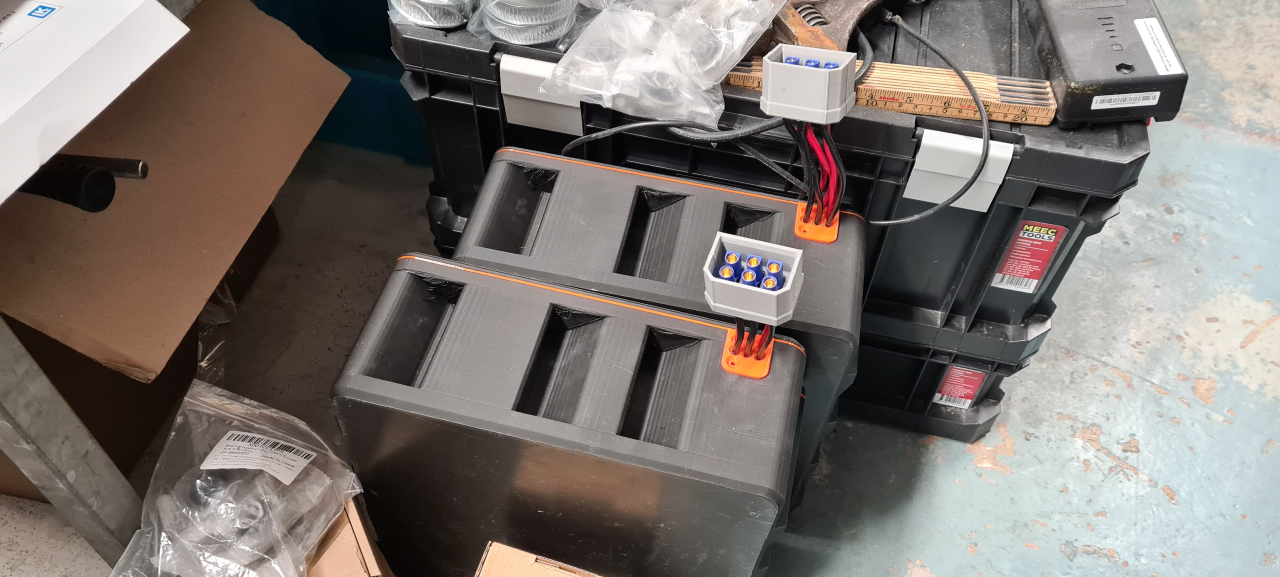
After having connected everything and made a new battery tray to fit an extra battery pack, the motor didn’t run. I loaded the correct settings file and modified it to fit the Avant, but the motor just jerked and sounded real bad and the controller had warnings about the hall sensors..

One reason I wanted to run the XXL motor with hall sensors was to be able to use the “Speed” setting on the control algorithm. This would let me choose the RPM and the controller would adjust the current to stay at that RPM no matter the load. However, what I didn’t know..

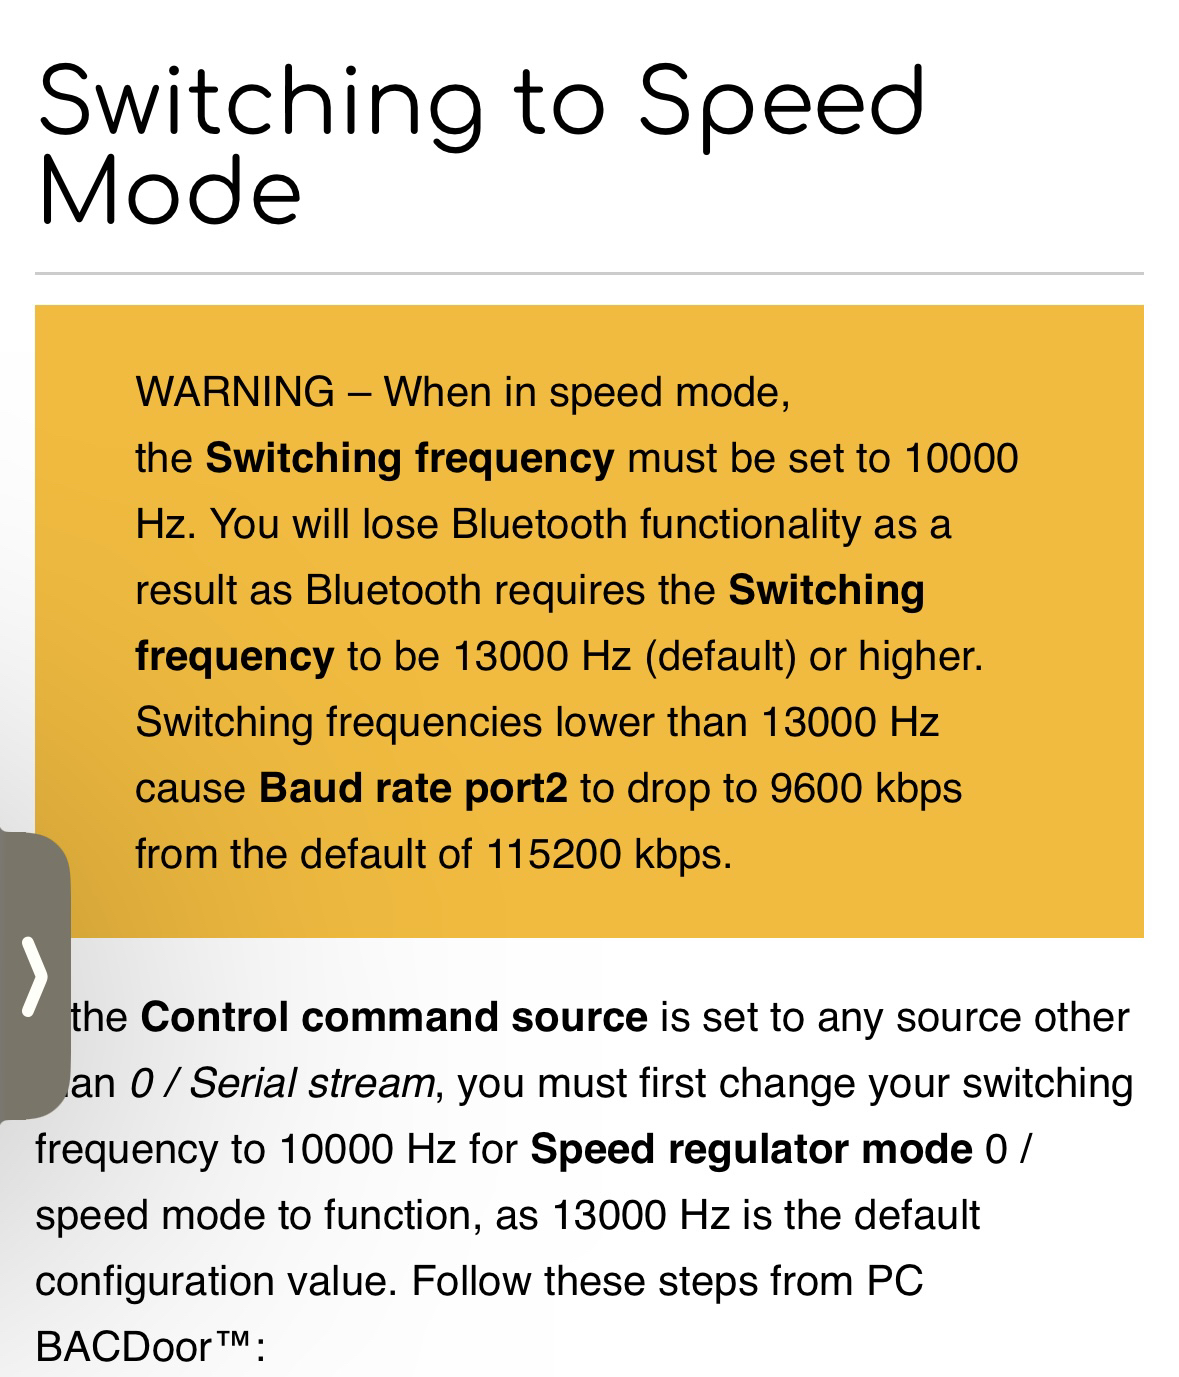
SO – while having problems with the hall sensors causing the controller not to be able to sense the speed it was running I set speed mode without setting the switching frequency and the bluetooth connection I’m using to configure the controller simply crapped out.

I couldn’t connect to the controller, and the controller wouldn’t run. 😀 *yey*

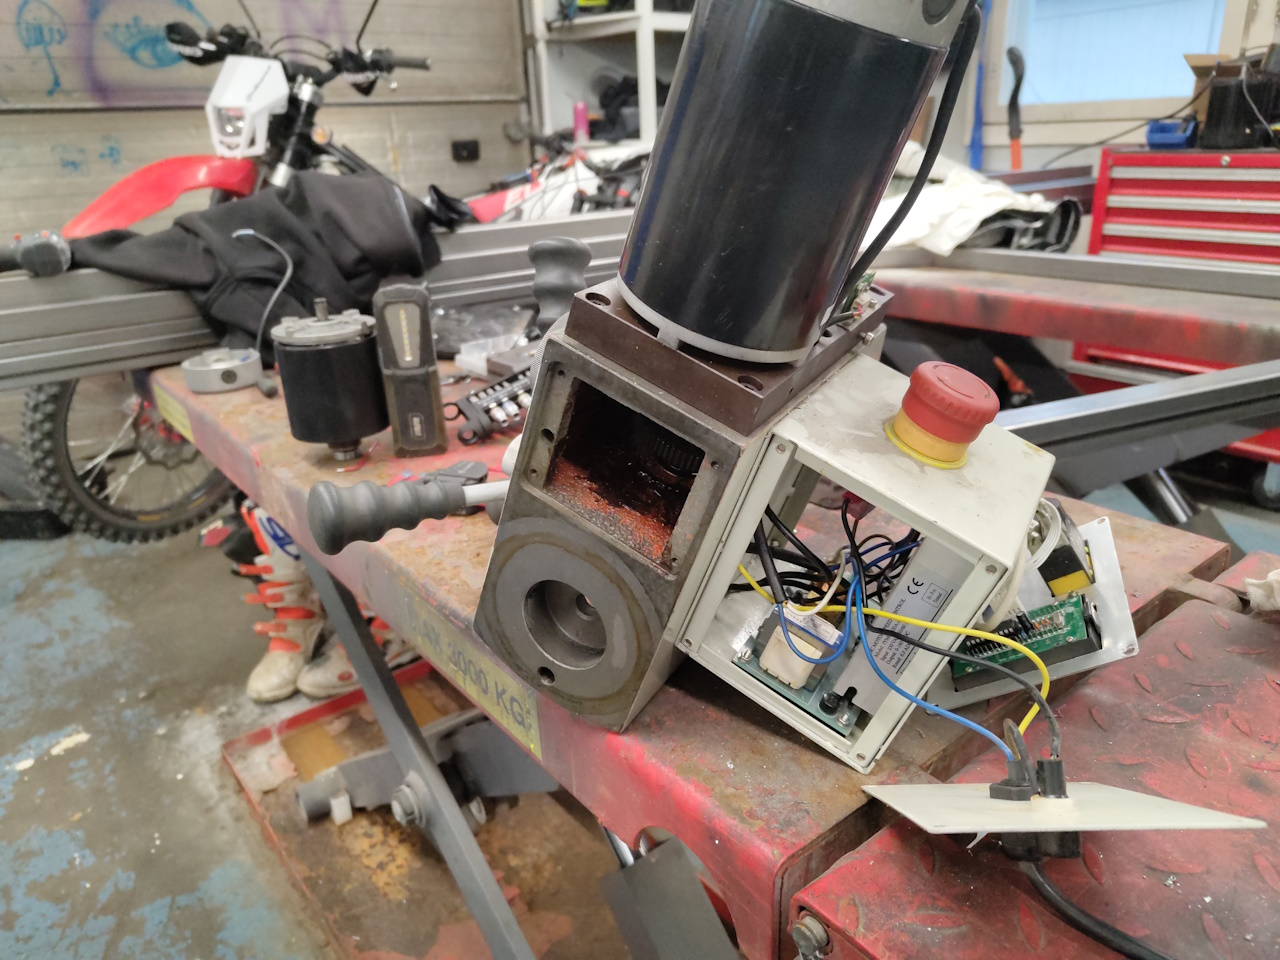
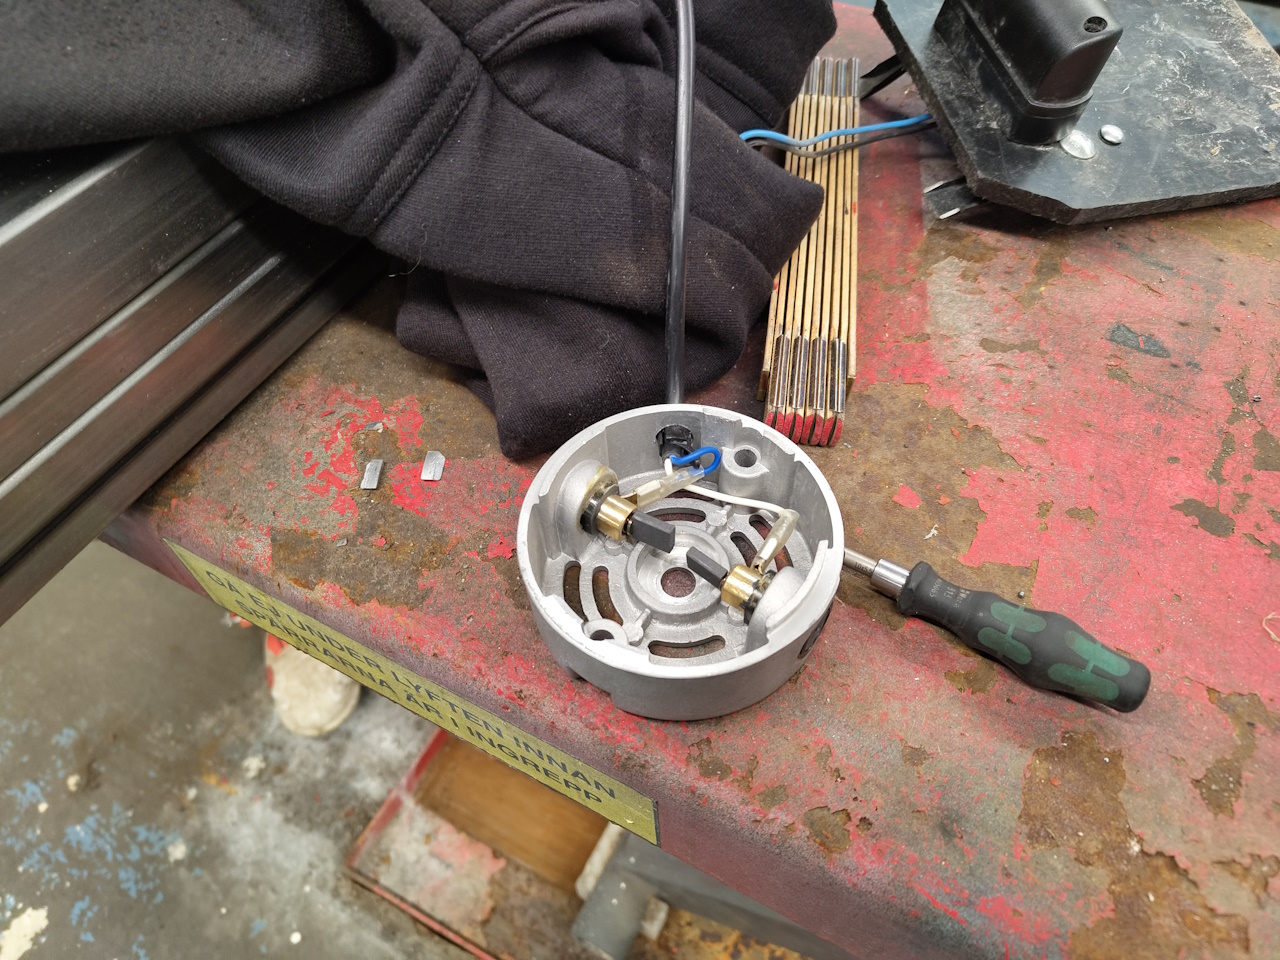
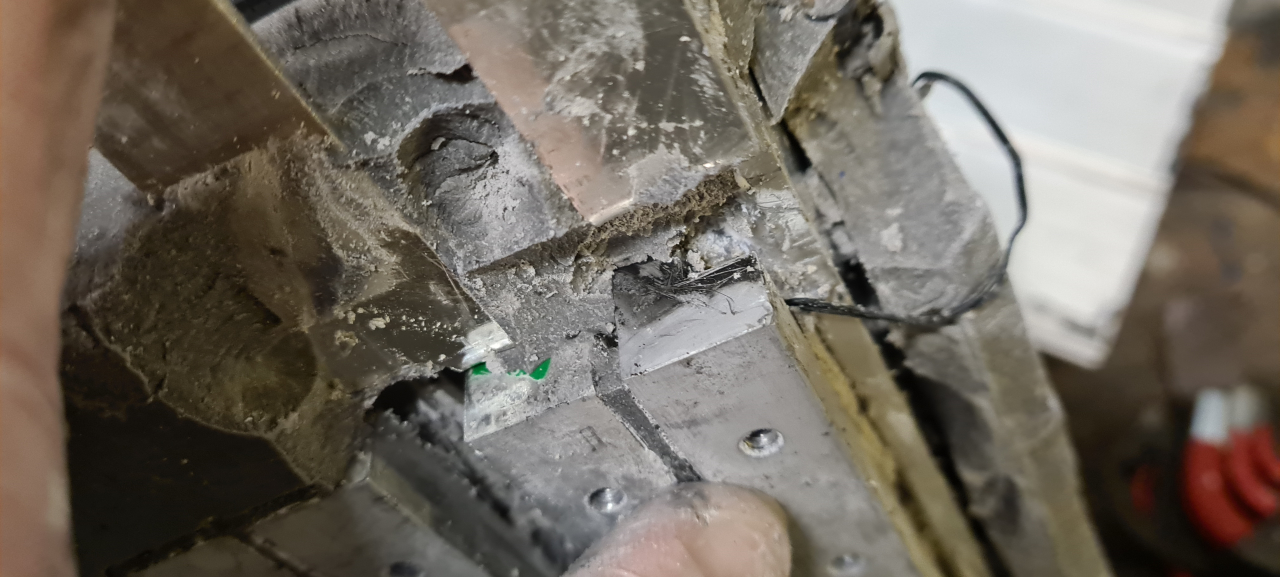
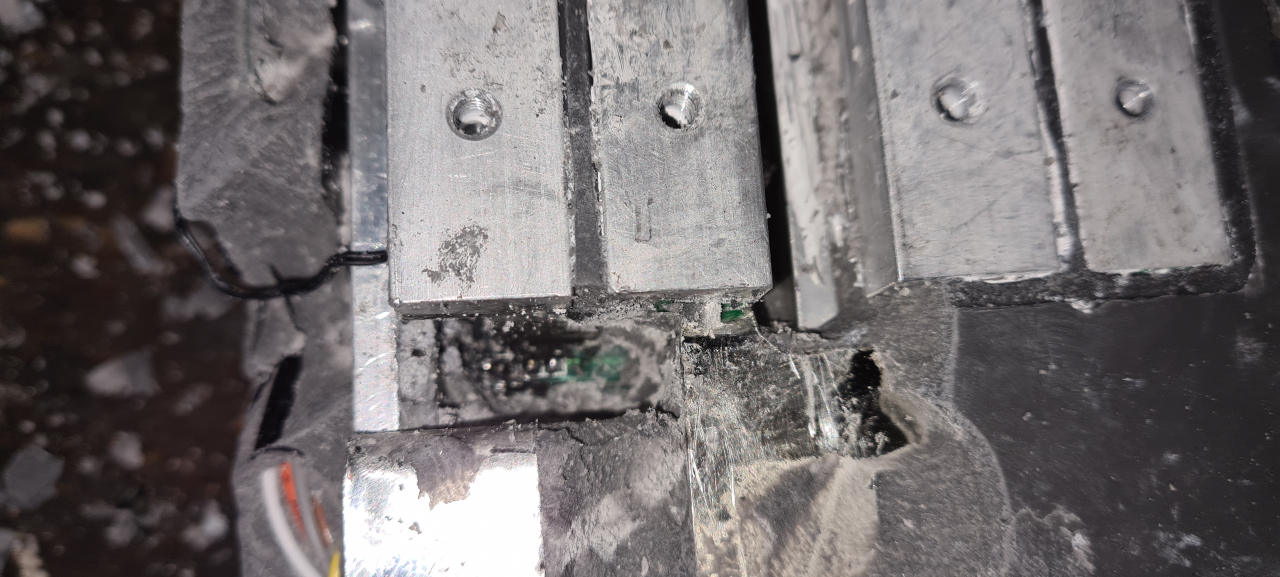
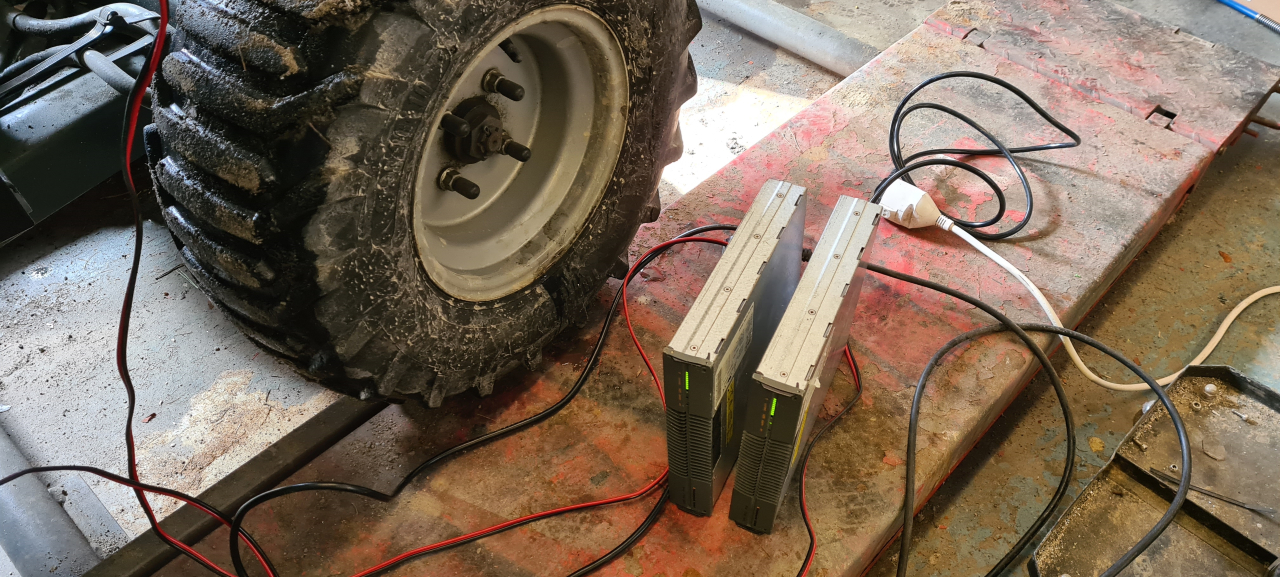
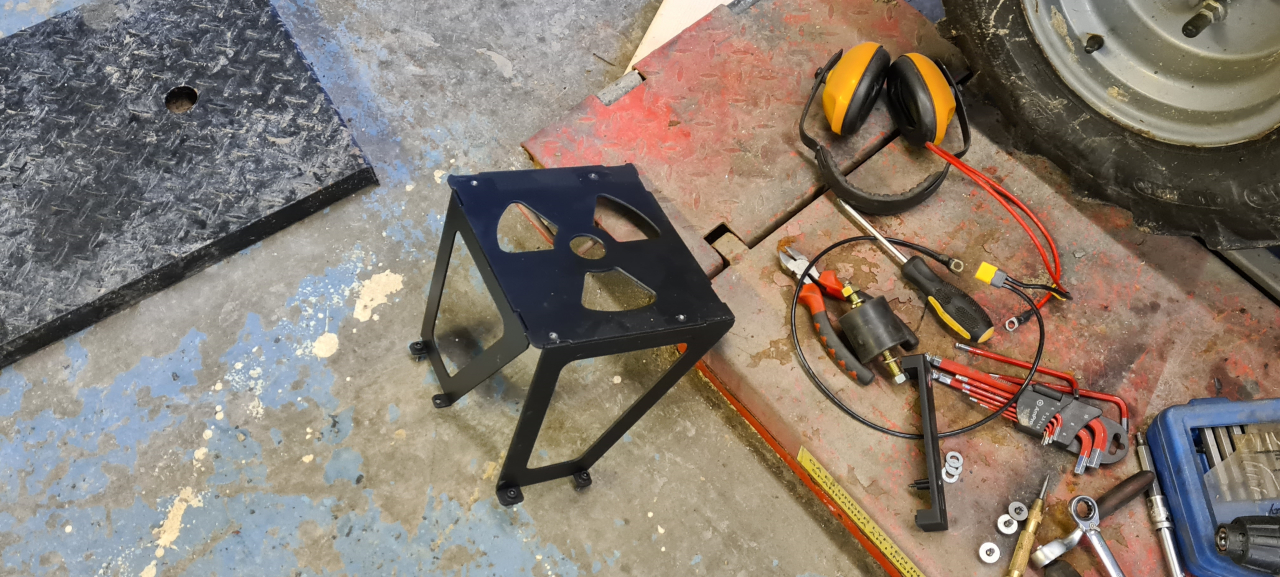
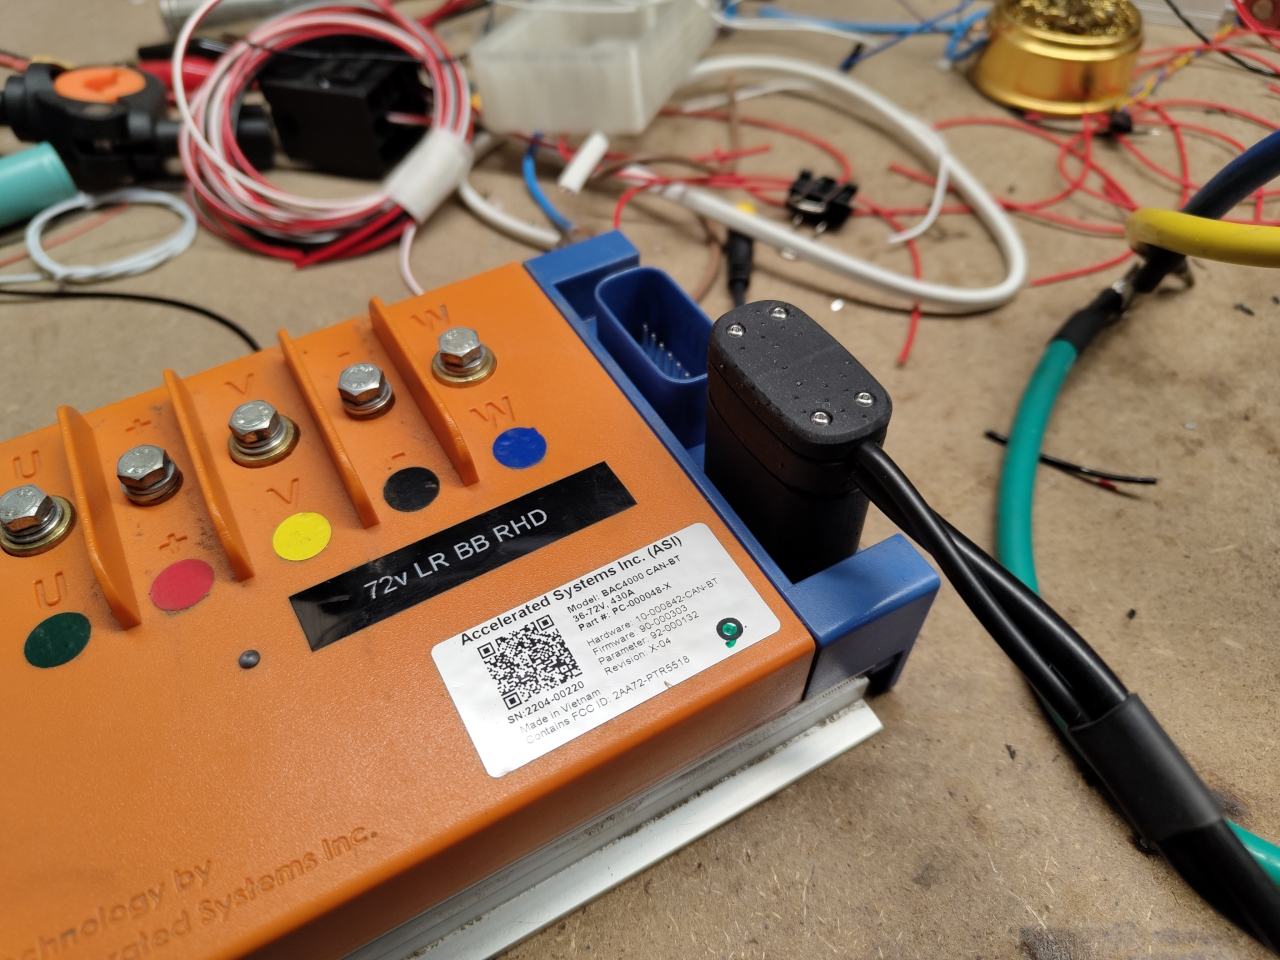
To solve this I had to remove the controller to get it into my office to connect it physically using RS232 to my computer. From there I could, with a lot of help from “Mr High Voltage” from the High Voltage discord, restore the Switching frequency, the control mode and the bluetooth baud setting. Having measured the hall sensors I figured I had just switched two cables, an easy mistake to make especially when all the other motors I have have custom wire looms that I’ve made myself:

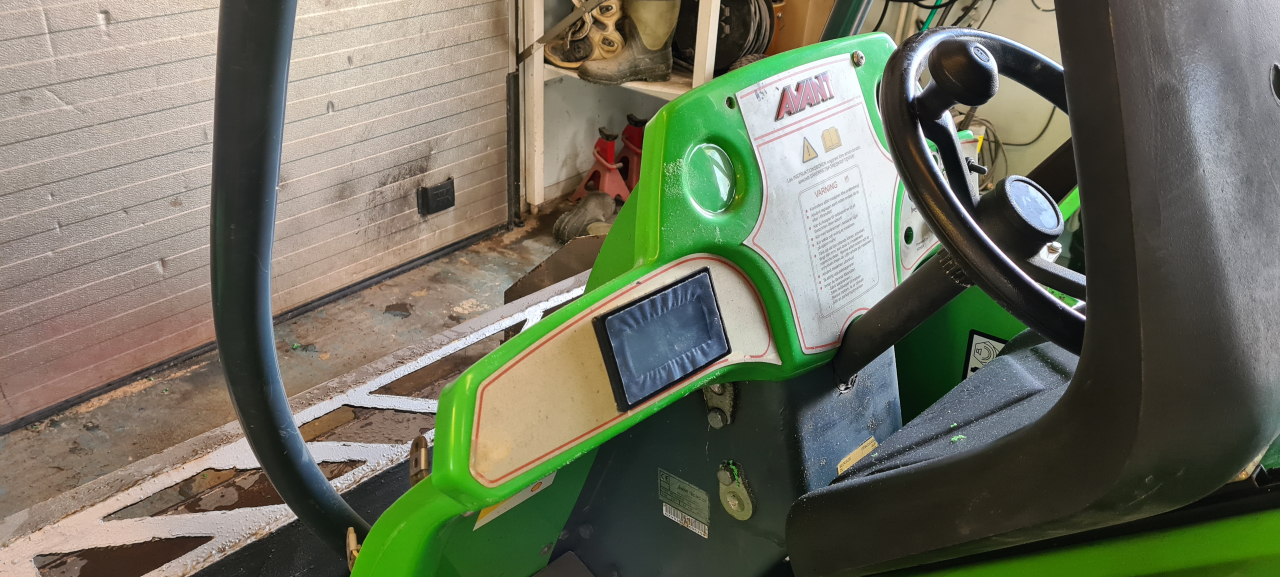
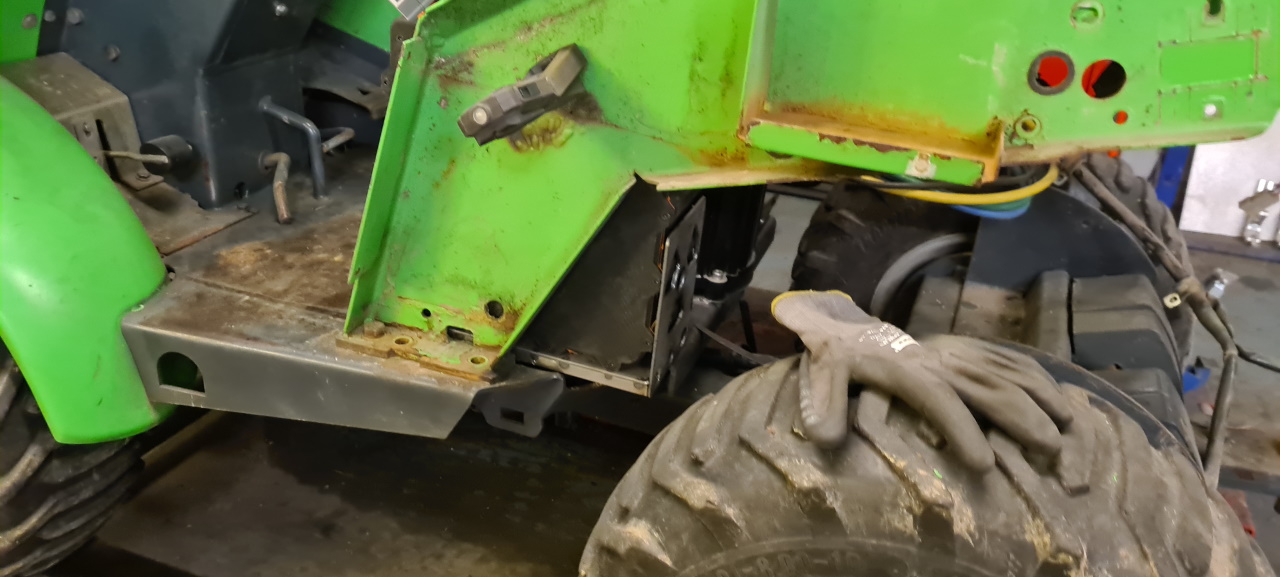
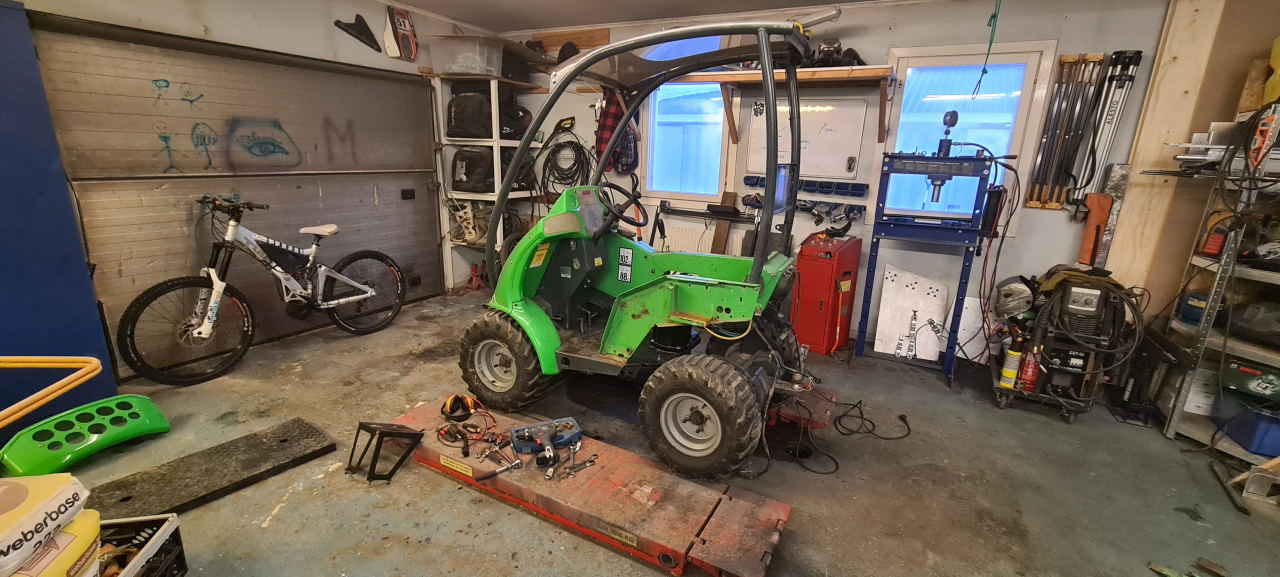
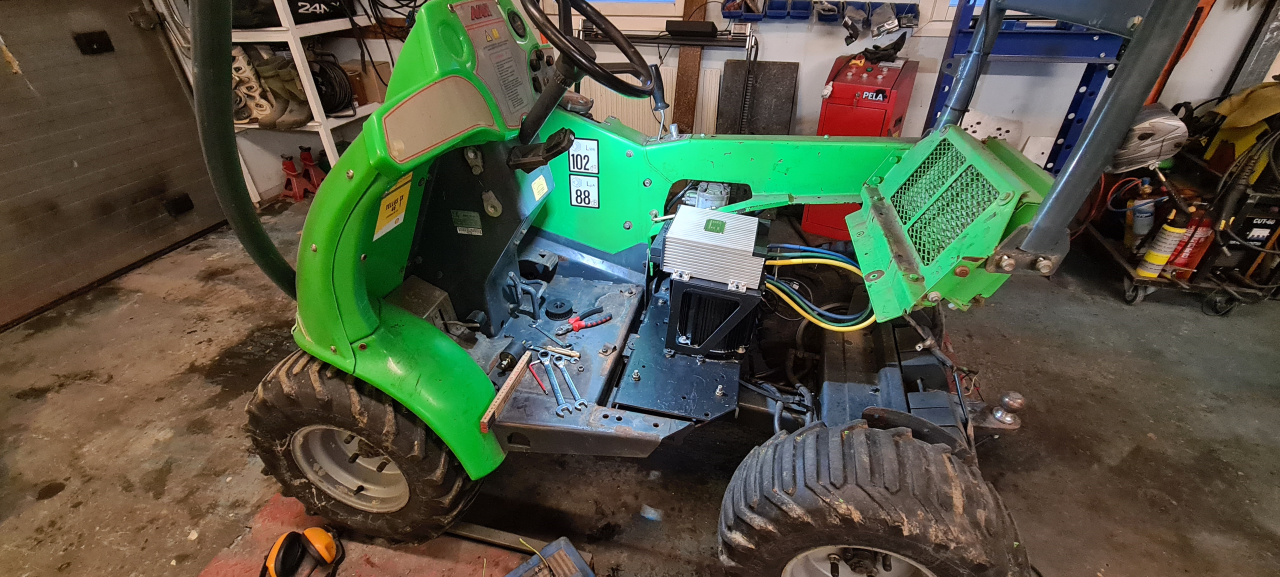
After a bit of rejoicing at the revelation that I hadn’t bricked the controller I put everything back on the Avant.

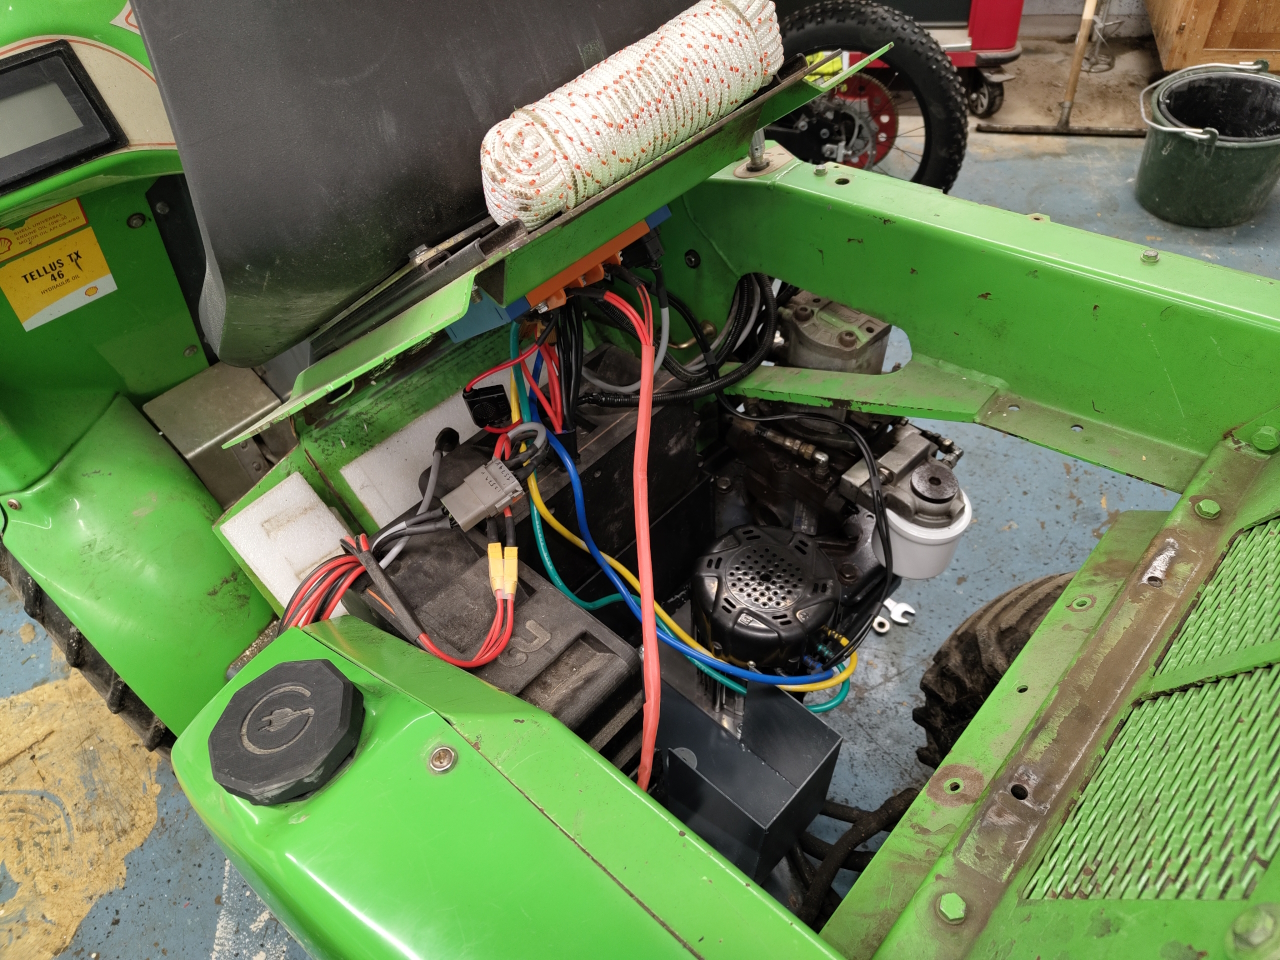
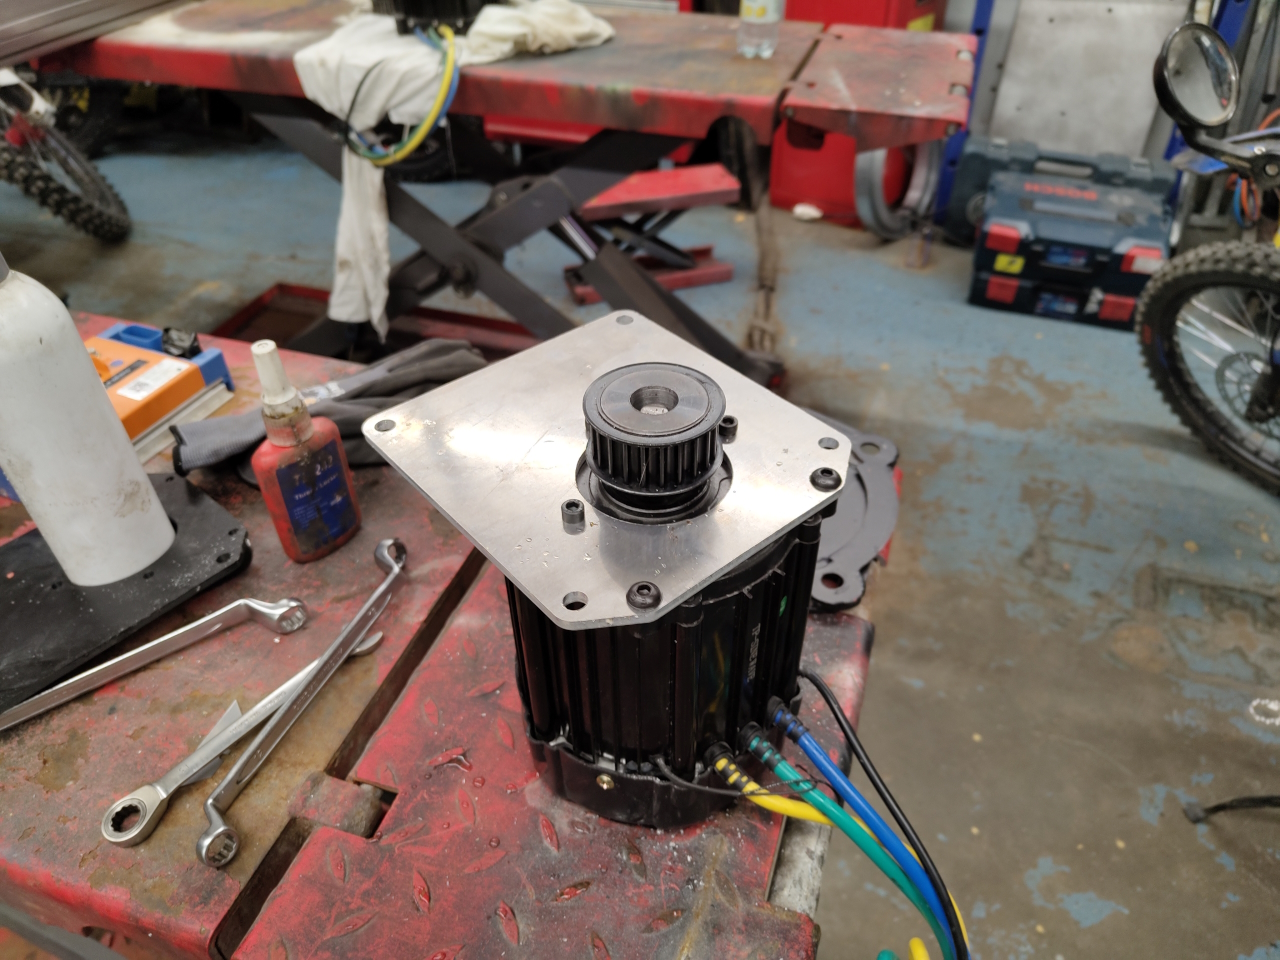
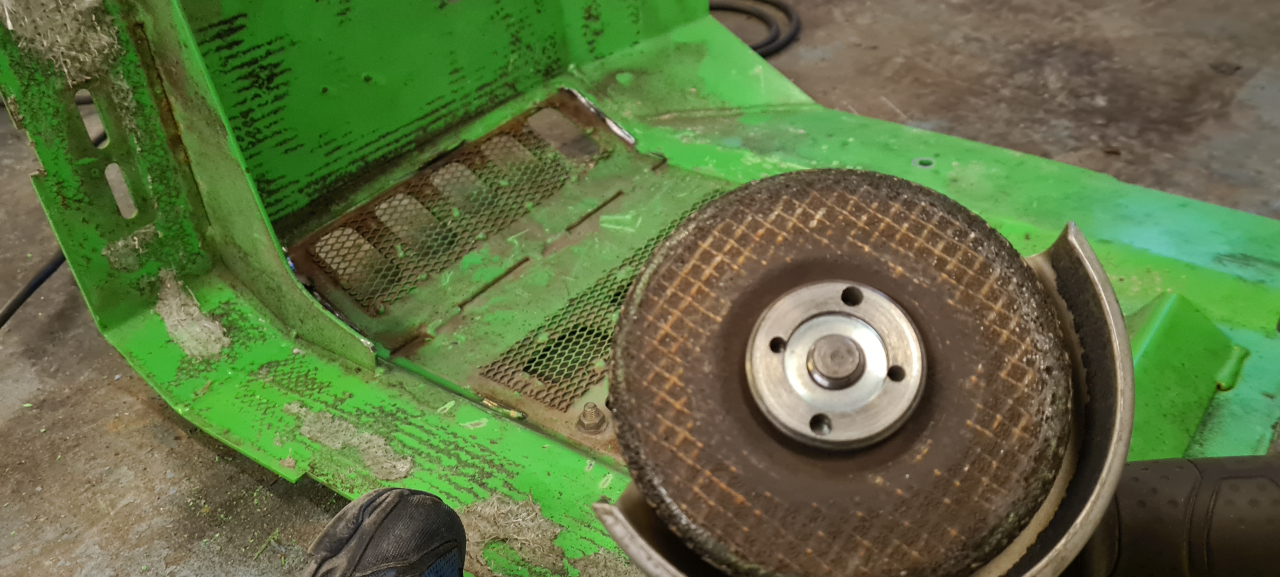
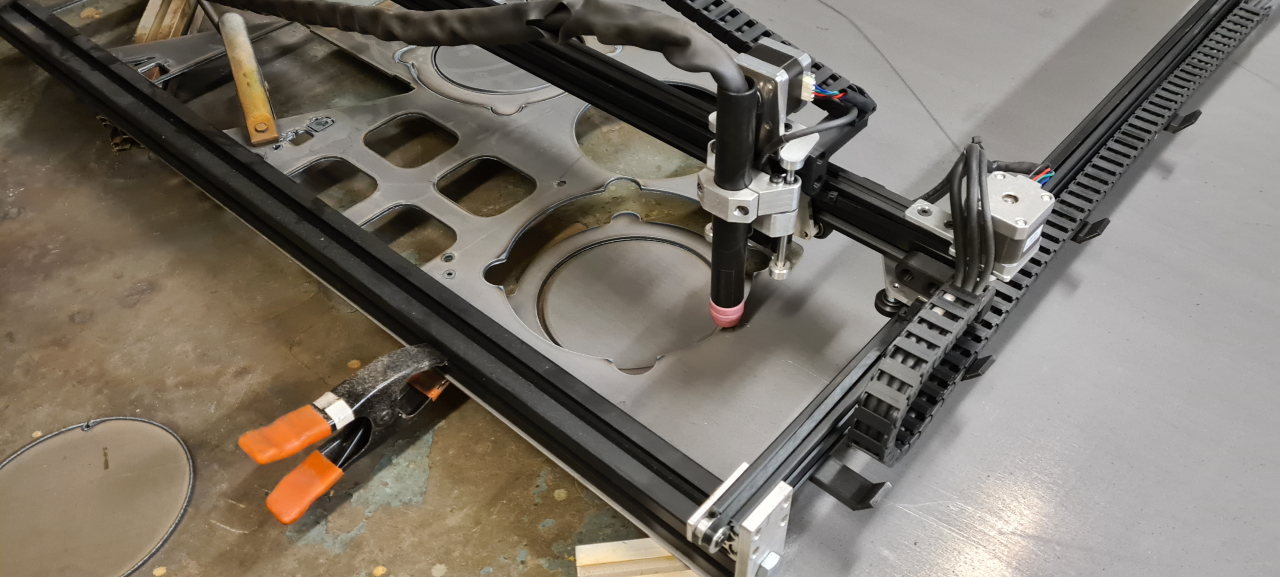
I shortened a few cables and tidied the wiring up as much as I could. Fixed a small leak on the hydraulics, made a washer to fit the belt wheel on the motor as it sat too low and touched the bottom plate of the machine and then the motor just spun like a kitten.

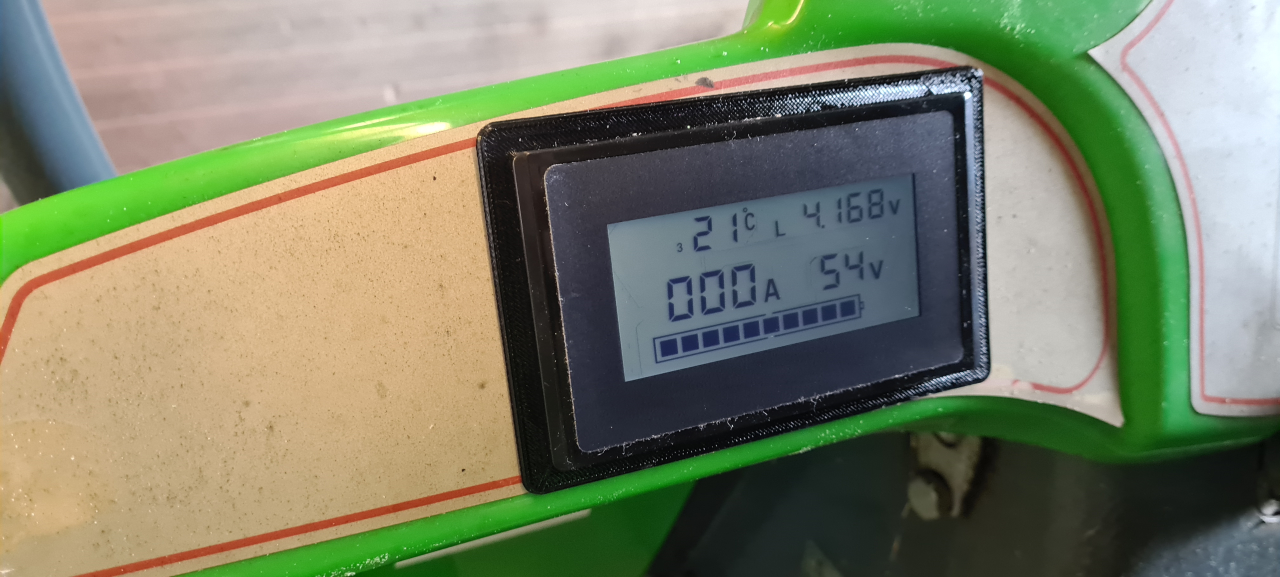
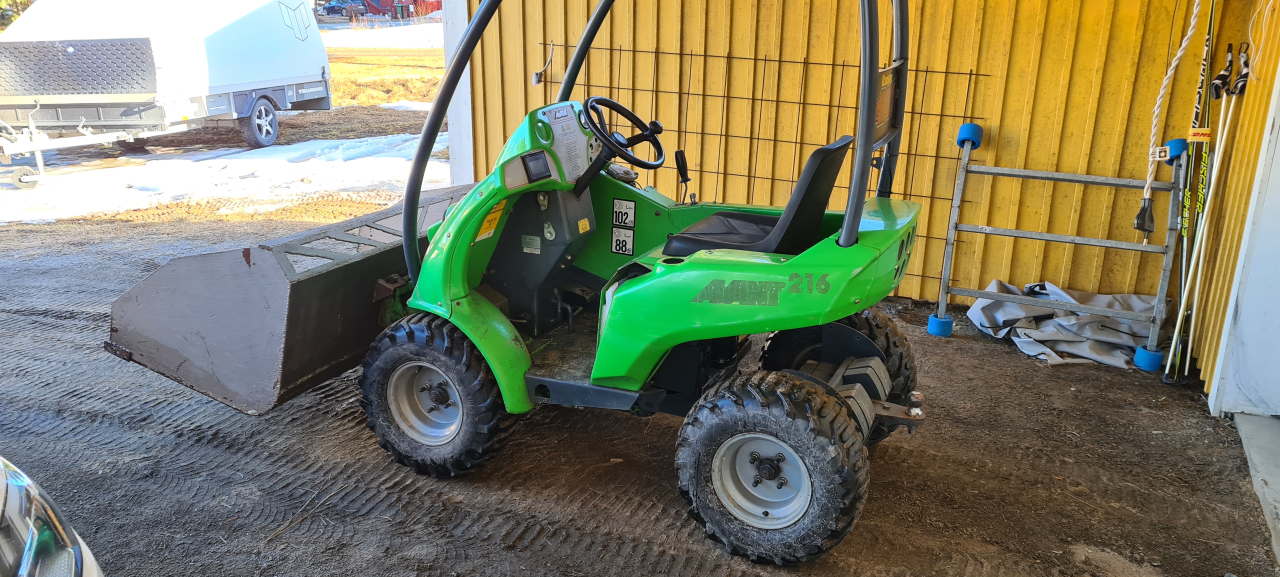
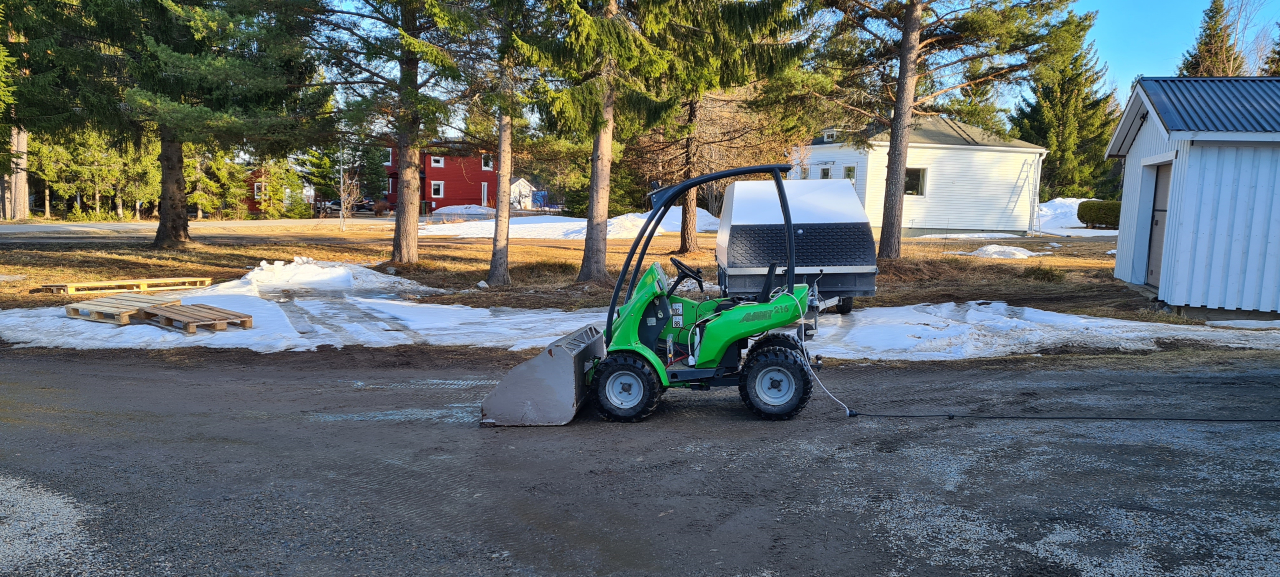
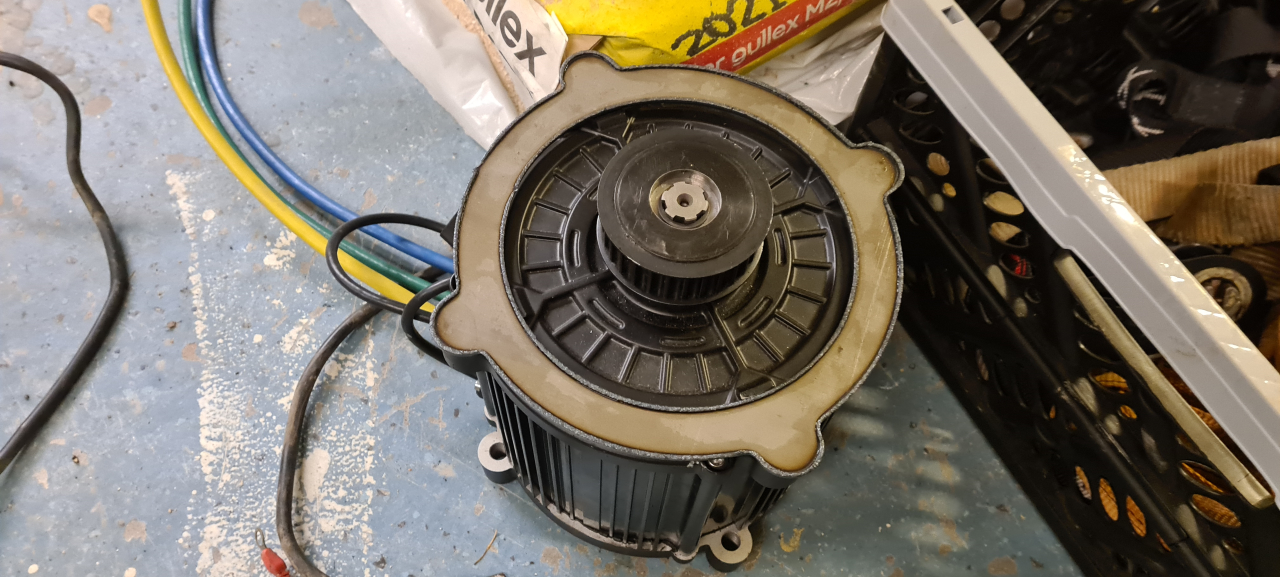
It feels like this motor is a much better fit for the avant. Even with the smaller belt wheel I get more RPM so the machine moves faster. It’s got a cooling fan so it can hopefully stay cool and with room for an extra battery pack I’ll be able to remove the snow from the driveway with volts to spare. 🙂

The only thing I’ve got left to do now is replacing a few joint shafts to get it a little less sloppy, and then the FUN project will start.

TBC

New motor mounting plate for the Avant XXL version

So after spending 5 minutes on the CAD, just as long on the CAM and 20 minutes on the mill I had a new mounting plate for the XXL motor.

I really like the finish of the milled aluminium, with chamfers and all. (It looks better IRL, the camera catches all the scratches and dings)

The plate fits the motor perfectly and mounts with 3pcs M6 bolts and 2pcs M8 bolts, holding it all securely in place.

Since the motor is a lot smaller than the QS180 motor I’ll probably be able to fit another battery pack in here. I’ll just have make a tray for the battery that I can bolt to the chassis.

I’ve got the parameters for the BAC4000 controller to run the new motor as well, so in theory I should just need to optimize the parameter file a bit and start the machine up again.. I’ll do a proper oil and filter service first though and replace a lot of the axles in the joints that’s worn out.. And I’ll try to be better at lubricating the joints in the future..

That’s all for this post, just a small update. To be continued..

Recent and upcoming projects

As usual in busy times there’s been some time since this blog got updated.. It’s not that nothing’s going on, more so that there’s nothing interesting happening worth writing about.

The house project is coming along nicely and we’ve put down the floors in the entry and wc-spaces. These are ceramic tiles which is super nice combined with the floor heating. So this is where most of the “hobby-time” goes nowadays.

I’ve finished yet another bafang-ebike build. This time with the neighbours kid and he’s got a custom RR-battery too. Works great and he’s super happy with the bike!

We’ve yet again restarted the #EOD simchair project, this time making the frame from a sturdier and more easily joinable material..

Making a welded steel frame makes it easier to get all the angles and mounts where we want them.. and it makes for a super sturdy frame that won’t bend like the bolted aluminium one did. More on this project in future posts.

I tried to mill some wood with my manual mill too, which the 500w motor mounted on there didn’t like.. so it tripped the ground fault breaker and didn’t want to start again.. Had to order a replacement motor for it, this time an 800w motor. We’ll see if the electronics can keep up but from what I can see the mill was built to accomodate the bigger motor.

Unfortunately the new motor was broken when I got it.. as soon as I unpacked it two metal pieces fell out and the motor didn’t turn around. Easy fix using parts from the old motor, but quite annoying still.

So, for the future projects?

We got the kid a Talaria Sting for his 15:th birthday and I’ve been trying to go offroading on my moped too.. It’s not quite the right tool for the job though, so something had to be done about that..

.. so I went and got myself a 2012 Gasgas 250f with the intention of making it electric. It’s not running right at the moment, and it’s super noisy and while the plan was to run it as a petrol bike this summer and do the conversion come fall, maybe those plans’ll have to change..

I’m going to use the QS180 motor that I’ve got in the avant for the bike, as it’s peaking at 5kW in the avant and that’s pretty wasteful as it can do more than 32kw continuously. Got the controller and batteries and all, display and DCDC converters are on the way from china.

So, the first project will be replacing the QS motor in the Avant with the LightningRods XXL that I’ve got on the shelf. That’ll probably be what the next post here will be all about, before starting the NoGas conversion of the 250f.

Well, that’s all for now. Stay tuned for more project updates.

Running the Evant, frying the controller and finishing up with replacement

So, yes, this happened.. :/

After running the evant for two charges the controller died. It starts, I can connect to it using the USB dongle but as soon as I give throttle input I get an overcurrent error.

Measuring the phases it turns out that one phase is shorted to B-, typical mosfet failure. QSmotor, that I bought the motor and controller from, was reluctant to send me a new controller even though they state there’s a 1year and 3 month warranty period. Somehow they say I damaged the controller but it’s virtually impossible to damage the controller in this way except when assembling it. In the end they offered for me to send the controller back to be repaired, or pay half the price for a new controller.. I chose to send it back, which it turned out was not a viable option at all.. so..
The problem with buying a new controller at half price is that Shanghai is shut down due to Covid and the factory is closed.. so QS couldn’t really tell me when I could get a new controller, so the Evant project halted..

Until..

I’ve already started planning my next project. It’s going to be a couple of awesome dirtbike replacements.. powerful LightningRod bigblock motors and matching ASI BAC controllers. More on this later. The thing is, I’ve already bought and got the motors and controllers. So.. I started out connecting my 50A VESC to the QSmotor, just to try it out, and sure – it runs. Wierd that the 800A APT96800 controller got damaged from pushing the same amount of power that a 50A VESC can handle.. well well..

For my build I’m going to use the ASI BAC4000 controller. It can handle 400+ phase amps but is limited to 72V max nominal voltage on the batteries. Since I’ve already built the 48V packs that’s going to be utilized in future projects as well, I’m running the Evant on two 48V packs in parallell yielding 60Ah and 2,9kWh. After discussing the matter with mr HV on the HV discord I connected the BAC4000 to the QSmotor and made connectors to precharge and connect the two packs in parallell.

One problem with this setup is that the QS motor uses an encoder to keep track of the rotor position while the ASI BAC only supports hall sensors.
But it turns out the BAC4000 actually handles the motor better in sensorless mode than the APT96800 did using the encoder. 😀
With the APT the motor sometimes stalled, loosing sync, requiring me to turn the machine off and on again for it to regain sync. The BAC4000 hasn’t lost sync once during the hours of use I’ve put it through.

Well, now that the machine runs again it’s time to finish the project. Until now I’ve been driving the Evant with an android tablet in one hand keeping track of the battery status..

The ANT BMS is super with it’s bluetooth connection and app showing all the data you need, but it’s a bit cumbersome driving around holding a tablet all the time.

I got a display that connects to the BMS in the battery..

Printed a sealed backside and TPU gaskets for it..

And viola, the last piece of the conversion is in place! The display shows the voltage of the battery, the temperature of all four temp sensors in the pack, the highest and lowest cell voltages and the current draw. Since the display connects to one BMS in one of the two batteries the actual current going to the controller is actually double what the display shows though. But now I can keep track of the battery status while driving the machine with two hands!

Today I’ve been moving heavy wet snow from our lawn just to test the Evant out. Turns out I can drive it for a little more than 50 minutes on a full charge..

.. and then it’s time for charging. I got two of these Eltek Flatpack 1500 from a friend and they’re able to push a little more than 30A each into the packs.
Unfortunately one of them had a problem with the voltage regulation and died after charging one pack but with these chargers I can charge one set of batteries in approx 45 minutes. This means that with 2 sets of batteries I should be able to run the machine back to back assuming the motor or controller doesn’t overheat.

So now the build is more or less complete.

I’ve got a few panels to remount that I need to repair first but the machine is definitely ready for use again.

Testing the limits of the battery I ran out of juice in the middle of the driveway..

So I had to get the charger and charge it for 10 minutes to be able to drive it back into the garage. =)

When stuff goes sideways like this it truly helps having good people to turn to. The Evant is running again thanks to the awesome help from Captain Codswallop and mr HV on the HV discord. They helped me tune the BAC4000 for my setup and have been super helpful in making the right decisions and making a wireloom that fits my needs. If you want to build a high power ebike or just make any kind of electric conversion I really recommend joining the High Voltage Light Electric Vehicles discord server.
Also, check out the HV channel on youtube:
https://www.youtube.com/c/HighVoltageKits

Well, that’s that. I’ll post further updates if the controller or motor fails, but for now this project is more or less finished! Hope you’ve found it interesting!

Making the puzzle fit

Started yesterdays work with welding the new controller mount. I decided that it was better to use the existing mounting holes in the motor than to build something around the motor, especially since fitting the battery packs and all leaves very little space around the motor. So I made a bracket that mounts on top of the motor. To fit the M12x1.5 screws I had to mill the heads down on them to be low profile enough to not protrude from the mounting holes.

This mounts rigidly to the motor and with the threaded M6 holes for the controller to mount to everything is snugly and firmly in place.

One advantage to mounting the controller like this is that I can shorten the phase cables quite a lot leading to less losses.. even though the cables are thick enough to withstand all the current the evant should need in the future – less is still more in this case.

Time for the next piece of the puzzle. Since I don’t have all the parameters for the plasma cutter perfectly dialed in yet there is quite some slag buildup on the parts, requiring some grinding and sanding to get them ready for welding..

This is where the battery box is going to sit that’ll house one of the two battery packs in the evant..

.. and this is what it’ll look like from behind. Quite awesome if you ask me.. Still everything needs primer and paint so the warning symbol won’t be as visible, but I’ll try to remedy that somehow..

And this is how the battery sits inside the machine..

I want the pack to sit as far forward as possible to make sure it gets as little abuse as possible from the wheel and whatever debris that might throw at it. I’m going to make a side plate for the battery compartent to protect it further..

The second battery pack is going to go the other way in the machine, sitting as far forward as possible in front of the motor.

Something like that. I’ll add padding to the cover to push the packs firmly in place and to cushion it somewhat – even though the batteries themselves should be able to withstand quite some abuse.. (hopefully)

The only problem now is that the packs actually won’t fit under the “hood” – which is also the mount for the seat, so..

Getting the grinder out and squaring up the problematic part. I just love working with steel, it’s such a forgiving material. If something’s wrong, just cut it up, make a new part and weld it all together, and it’s strong as ever! Add some paint and it looks like new..

So with that modification the battery fits in the machine. Now it’s just a matter of making the pieces I need to cover all holes I’ve made and welding it all together.. After that I need to take care of the electrical wiring, adding the 12V DC-DC converter and installing the BMS displays (whenever I get those from China).. So, quite a lot more to do but the hardest part is done I guess..

So far it’s been a super easy and super fun project.. Let’s just hope it works when all is complete.

TBC

Fitting the battery pack in the evant

So, when everything was installed and fitted I realised there was only 200mm where the batteries needed to go, and the batteries are 230mm wide.. Hmm.. Well..

I started with removing the controller and the controller bracket but still the batteries won’t fit side by side.. So I tried a few placements and some could fit the battery pack but parts of it would interfere with the rear wheels when turning, other placements wouldn’t fit at all until I found one that fit..

To make sure everything fits height-wise I put the seat mount back on the machine. There was some interference so I had to chop it up a bit..

Cutting and grinding discs on the angle grinder has a way of setting things on fire.. mostly me, but today all that caught fire was my gloves.. =)

Some steel removed from the inner side of the seat mount and now it all fits with margin to spare!

Since I got rid of the mount for the controller and since I need some brackets for the batteries I rigged the plasma cutter to cut some steel.

After a bit of fiddling due to the steel sheet bending (I need a THC) it finally made a puzzle!

Tomorrows task will be cleaning these up and welding them to something that looks kind of like this..

After that the batteries should fit and the controller should be rigidly mounted to the top of the motor.. If that happens all that’s left is to build the final version of the throttle, remove all spare wires from the wiring harness and route everything to the dash.. Oh, yes, I need to mount the DC-DC converter to get 12V from my 110V battery too, and wire in a main switch.. Well..

TBC

First test run of the evant

And there it is:

It’s finally moving, powered by the electric motor!

I connected two of my emergency get-back-home ebike batteries of 48V 4Ah with a maximum current output of ~15A. That’s way to little to drive the QS-motor that’s in the Evant but still it runs. Don’t want to run it for too long though since I haven’t calibrated the valve for forward/backward motion and have to keep the P-brake engaged for the machine not to roll off the lift it’s on – which makes for quite some resistance in the hydraulic system.

The twist trottle is quite unusable in the Evant so I’ve made a quick hack for a system to control the RPM of the motor:

It’s just a 10k potentiometer and a switch. The plan is to set the RPM with the potentiometer and use the switch as an on/off switch to turn the motor off whenever it doesn’t need to run. That way I won’t need to adjust the RPM of the motor to turn it off, which I’ll want to do every time I’m standing still and not working with the machine.

Just made a quick and dirty connection to try it out and it works just as expected. So the next step is to make some kind of enclosure for it, put a better cable on it and a proper connector.

TBC

Mounting the motor and controller on the evant

So, when test fitting the motor I realised the bottom side of the motor isn’t flat so it needed a spacer to sit flat on the motor mount.

Fortunately, now that I own a CNC plasmacutter, making a spacer like this is just a couple of minutes of work.

This fits perfectly on the motor. Welded the spacer to the motor mount and used the plasma to cut the inner hole out of the mount as well, and after some paint..

.. it was time to mount the motor in the Evant again.

I decided it was way to much work trying to mount and unmount the motor when bolted with the M12 bolts from underneath so I welded the holes I had drilled and drilled and tapped holes for M8 bolts instead. This way I can remove the motor without the hassle of fighting with the hydraulic pump all the time making life much easier for me! 4x M8 should be strong enough to hold the motor in place easy.

With the new, shorter belt the position of the motor is perfect. I can adjust tension in both ways and get a properly tensioned belt. So, with this confirmed it was time to mount the controller.

On goes the controller mount using M6 screws.

And on goes the controller. The wires between the motor and controller are way too long and I’ll shorten them once I’ve test run the motor.

When measuring I’ve got about 20mm too little space to fit my batteries, so that’ll have to be remedied somehow.

The next step is to figure the wiring out. Most of those aren’t going anywhere on my machine so I’ll disconnect them from the connector and make a new wiring harness with only the leads I need. All I really need is the mains switch, the speed input and the hall sensor and thermistor input signal wires.

So, hopefully I’ll be able to spin the motor up tomorrow. I’ll just have to make a wiring harness to get 96V into the controller.. and a better throttle..

TBC

Finishing the battery pack for the Evant

When all the copper plates were welded to the cells and all the BMS wires were added..

.. it was time to finish the battery build. I printed the box and the TPU divider and put the cell pack in it’s place.

I’ve bought a couple of ANT 300A BMSes to protect the packs and they come with screw terminals mounted.. so I pressed the same type of terminal on the negative leads of the pack..

After that it was just a matter of adding the BMS.

.. connecting all the wires ..

.. and pushing the positive and negative power feeds through the TPU grommet..

To finish the packs I soldered EC5 connectors to the power leads and printed a “connector” to house the 3 connectors to make it easier to connect the battery pack to the Evant and impossible to connect the wrong leads shorting a battery pack out..

So.. now I’ve got one complete battery pack of 26s10p which gives me a 96V pattery with 30A capacity yielding a whopping 2,9kWh. This is what I’m going to use for testing. I’ve got enough cells to make one more complete setup so that I can charge one pack while using the other. Hopefully I’ll be able to run the machine for at least half an hour on each pack.. Doing the math :
Avant original motor power: 10kW
Estimated mean power output: 33%
Estimated mean power output: 3.3kW

That should give me almost 55 minutes of run time on my pack, but to have some margin let’s say 45 minutes. Charging the pack at 30A (1C) would take more or less an hour to charge the pack fully, so it might be possible to get back to back running.. otherwise I can build one more pack to have two packs charging while I’m running the third. That should give me continous driving with pretty good margins but it’d cost me approx $700 to build.. We’ll see how it works, only testing will tell..

TBC